
A basic Thermomix Kimchi like this recipe is the perfect place to start when you are ready to learn how to ferment vegetables.
Estimated reading time: 8 minutes
I've been really getting into eating fermented foods for their probiotic health benefits. As part of my new gut health protocol, I've been eating a lot of Kimchi and drinking Kombucha every day. It didn't take me very long to realise this was going to be an expensive habit! I knew I would need to learn how to make my own probiotic foods if I was to continue eating them as regularly as I liked. That's how my beginner's Thermomix Kimchi was born.
I made my first batch of Kimchi in 2016 and have been experimenting since then. This recipe was my first basic Thermomix Kimchi. You could easily make it without the Thermomix, but I like to cut corners as much as possible.
As with everything you prepare yourself, homemade Kimchi is so much better than the store-bought varieties. Not that I have anything against the store bought products, but I love being able to add my favourite vegetables and allow them to ferment to the level of funkiness I prefer.
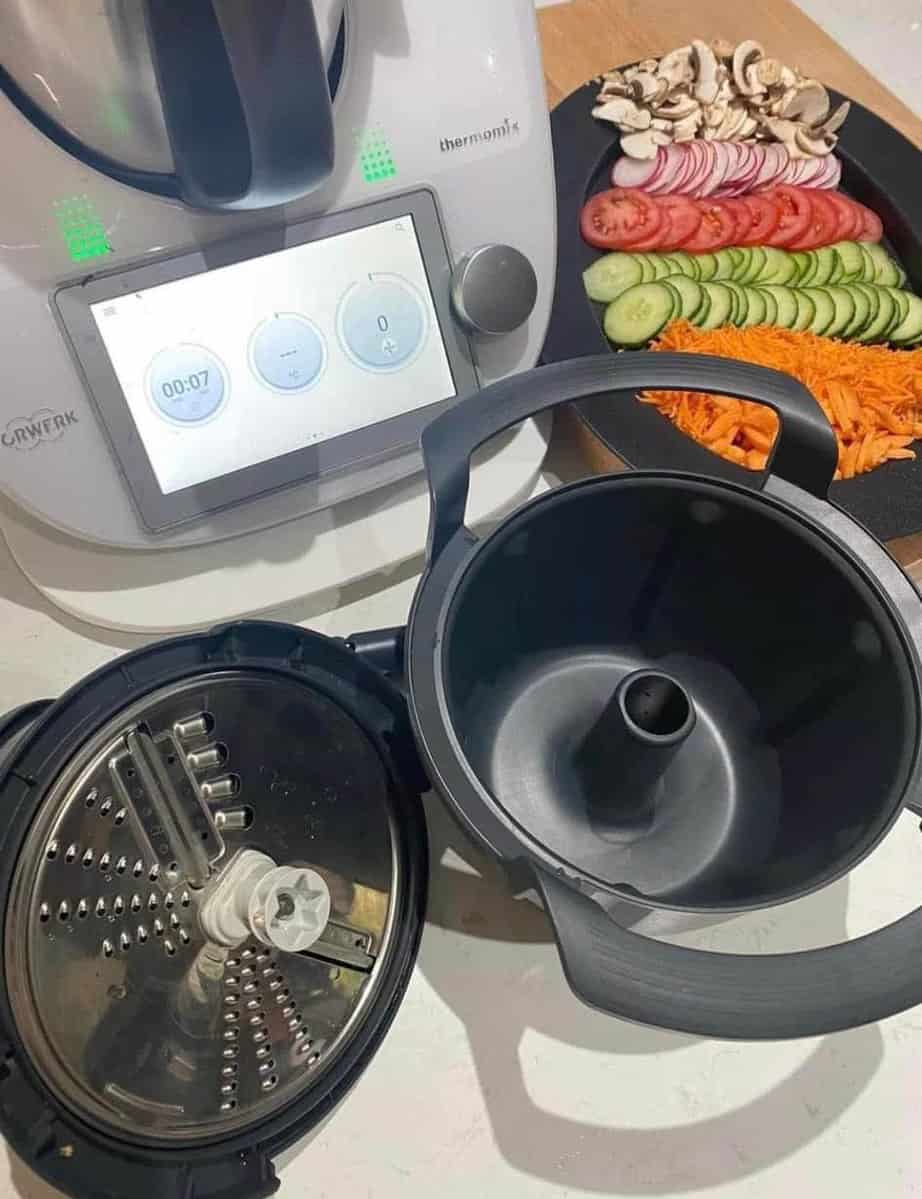
Thermomix Cutter & Grater Accessory
Like I said, I love shortcuts! Using the Thermomix cutter to slice the cabbage or thickly grate the carrot is a fabulous shortcut and saves knuckles. I don't want to count the amount of times I have grated knuckles when I use a box grater!
Basic Kimchi Notes
- The brine will rise to the top of the vegetables as you press them into the fermenting crock. If necessary add a little more of the reserved brine to completely submerge the vegetables.
- You can add as much as you like depending on whether you want more or less "juice" in the kimchi. (Excess brine will bubble out of the crock as it ferments.)
- Place a crockery or glass weight on top of the vegetables to keep them submerged as they ferment. (Some fermenting crocks come with their own weights.)
- Ensure the crock lid always has water in the chamber to keep an airlock.
- The fermenting crock can sit on the kitchen bench until it's ready.
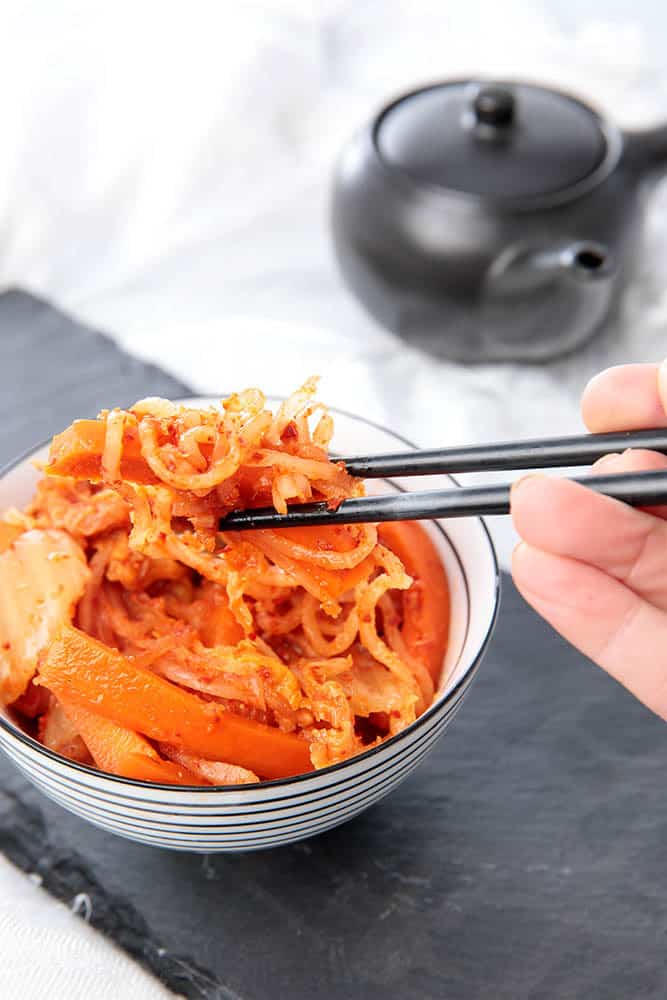
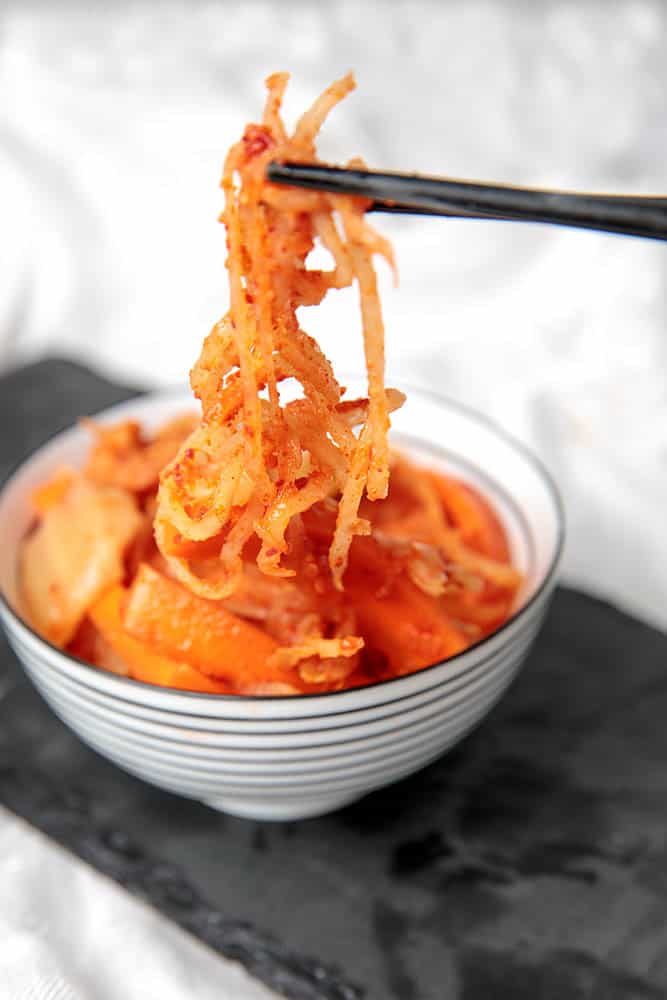
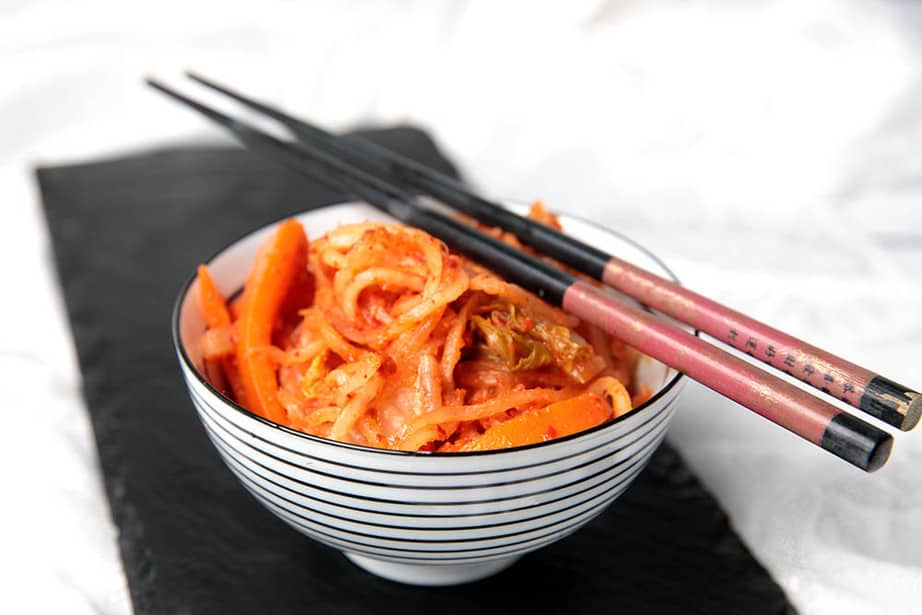
Kimchi can be eaten fresh on the day it's made or at any stage of fermentation. Once the taste is to your liking transfer the Kimchi into smaller jars and store in the refrigerator to slow the fermentation process.
I have to admit that I was kind of freaked out about making my first batch of Kimchi. I was scared I would poison myself or just grow a smelly, mouldy mess. Even once the fermentation was complete it took me a day or two to become brave enough to open the fermenting crock. When the crock was open I was surprised to find delicious looking kimchi. I very gingerly nibbled on a tiny strand of daikon radish and to my surprise, it tasted perfect, just like the real deal!
Basic Thermomix Kimchi Watchpoints
Fermenting in a Crock with Airlock
The key to cultivating probiotic bacteria and not mould is allowing the fermentation to occur in an anaerobic environment (no oxygen). If oxygen gets into the crock the vegetables will grow mould and the kimchi will only be suitable as compost. Look for a fermentation crock which has a water airlock trap. This allows the carbon dioxide to escape as the food ferment, without allowing air to enter the fermentation vessel. This is the crock I am currently using to make my kimchi.
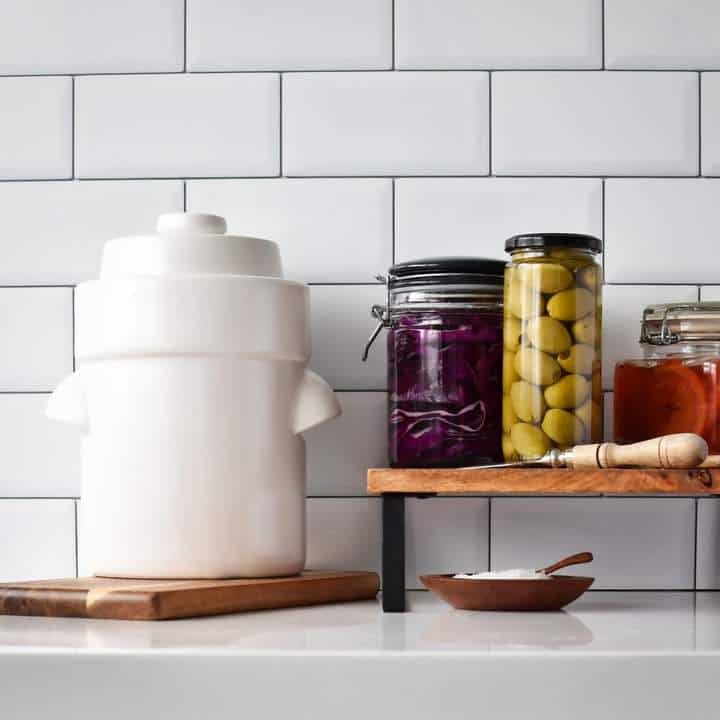
Fermenting in Jars with Pickling Pipe
There is a cheaper method than the crock I use. If you would like to start simply and with a cheaper alternative you can use fermenting in jars with a silicone pickling pipe which provides a fermentation airlock. It's also best to use BPA safe plastic lids otherwise you will find that due to the acidic nature of Kimchi rust will develop quickly in the lid.
Use Pure Products
- Water - Tap water is unsuitable for the kimchi as it has been chlorinated. Chlorine kills bacteria, even the good bacteria that we want to cultivate. Use bottled spring water with no additives.
- Salt - Salt should be non-deionised table salt. As with chlorine, iodine is an antibacterial agent. It actually kills, yeast, bacteria, fungus, viruses, and moulds. So if you want your Kimchi to ferment you need to choose salt which hasn't had iodine added. I use this particular Himalayan salt.
- Fish Sauce - When purchasing fish sauce look for a brand which has no preservatives. Preservatives will inhibit the growth of our good bacteria in the ferment.
Ferment out of direct sunlight
The kimchi needs to ferment away from direct sunlight. Sunlight kills bacteria so it's best to put the fermenting vessel in the pantry or a cupboard.
Place a large plate under the crock
As the vegetables ferment carbon dioxide will bubble up through the water lock. This can cause spillages of water and brine from the crock. By placing a plate under the vessel cleaning up is as simple as changing the plate each day.
Probiotic Recipes Please
If you would like to be notified when more pro-biotic recipes are released please subscribe to our newsletter. We only send a newsletter to our friends when we have a recipe to share.
Let's Connect!
I share loads of great recipes on the website, but those who find out first are my special newsletter friends. You can even choose your favourite topics!
I also have a lively social community. Take a look at the Facebook Group page. It is a fabulous place to ask questions, join the chatter, and share images of recipes you have made! It helps inspire others to cook new and interesting dishes.
If you want more Magimix, Optimum or Thermomix recipe ideas or information, please follow the ThermoKitchen FB Page. I post everything I know here first!
GET INSPIRED;
FACEBOOK
TWITTER INSTAGRAM PINTEREST YOUTUBE
Do you want to connect with other pro-biotic foodies? Join my DYI Fermenting FB group page I share loads of great recipes and tips in the group.

Basic Thermomix Kimchi
Equipment
Ingredients
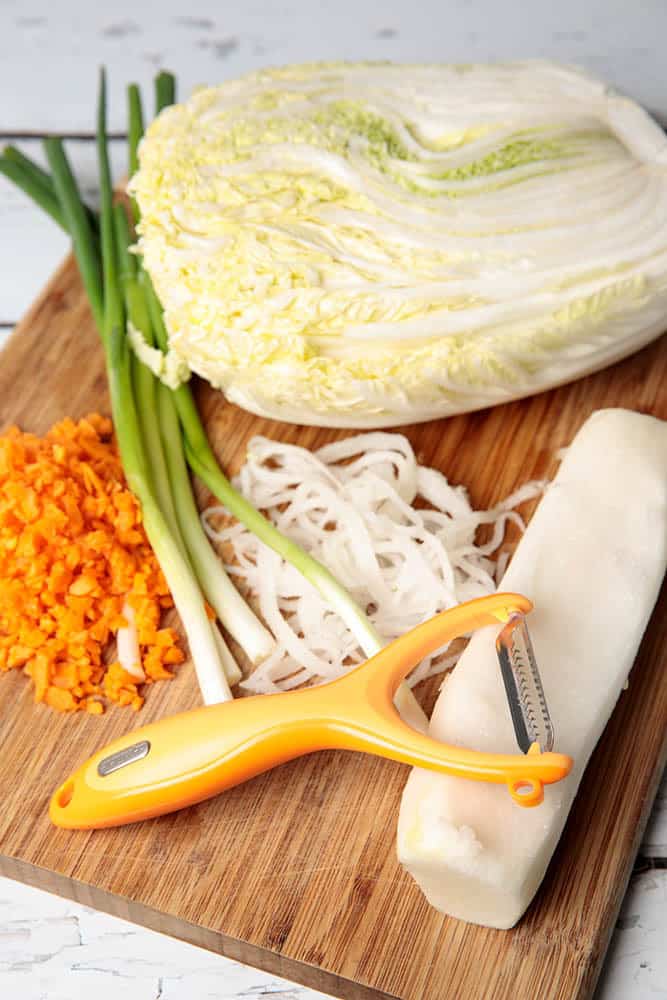
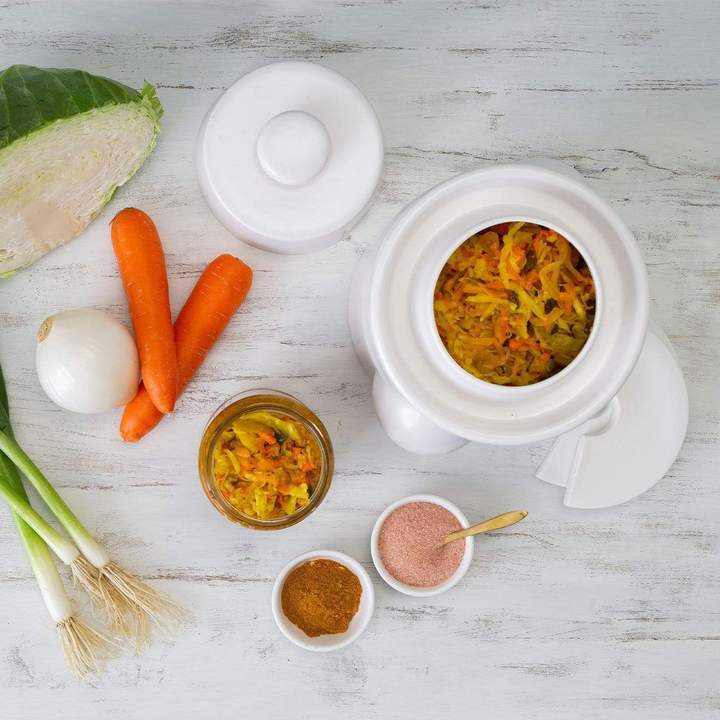
- 1350 gm napa cabbage wombok (approx 1)
- 750 gm daikon radish peeled
- 750 gm carrot (peeled and cut in quarters)
- 6 green shallots
Kimchi Paste
- 300 gm onion cut in half
- 25 gm garlic
- 20 gm fresh ginger
- 60 gm Korean Chilli Gochugaru paste
- ¾ cup fish sauce (natural only - no preservatives) OR ½ cup salting brine for a vegetarian version
Brine
- 6 cups natural pure water bottled (not tap)
- 6 TBS Himalayan salt (or another non-iodised salt)
Instructions
- Coarsely chop the cabbage and reserve.1350 gm napa cabbage
- Cut the shallot into 2 cm pieces and add to the reserved cabbage.6 green shallots
- Shred the daikon radish by hand or chop in the TM.750 gm daikon radish
- Add 150gm daikon at a time to the TM bowl. Chop 4 sec /Speed 5.
- Transfer the daikon to the bowl of cabbage. Repeat the process until all the daikon is chopped.
- Add 150gm of carrot at a time to the TM bowl. Chop 4sec /Speed 5.750 gm carrot
- Transfer the carrot the bowl with the cabbage. Repeat the process until all the carrot is chopped.
BRINING
- Mix the water and salt in a large non-reactive bowl until dissolved.6 cups natural pure water , 6 TBS Himalayan salt
- Add the vegetables to the brine and submerge them fully for 3-4 hours or overnight.
- Drain the brine off the vegetables. Make sure to reserve some of the brine.
- Rinse the vegetables in fresh water 2 or 3 times to remove excess salt.
KIMCHI PASTE
- Place the ginger, garlic and onion to the TM Bowl. Mince 5 sec/Speed 9.25 gm garlic, 20 gm fresh ginger, 300 gm onion
- Scrape down the bowl.
- Add the Korean chilli and fish sauce (or ½ cup of brine if vegetarian) to the garlic mixture. Combine 15 sec/Speed 6.5.60 gm Korean Chilli, ¾ cup fish sauce
- Add the Kimchi paste to the drained mixed vegetables.
- Mix the paste through the vegetables thoroughly, until they're completely covered.
- Lightly press the kimchi into a 2 litre fermenting crock.
- The brine will rise to the top of the vegetables as you press. If necessary add a little more of the reserved brine to completely submerge the vegetables.
- Place a crockery weight on top of the vegetable to keep them submerged as they ferment.
- Cover the jar or the crock lid to deter unwanted insects or particles. They won't be able to get in the crock but as water bubbles out onto the plate they may be attracted.
- The fermenting crock can sit on the kitchen bench away from sunlight until it's ready.
Notes
Log in: Then add your own recipe notes below!
Nutrition
So there you have it, a no-fuss, basic recipe which will work every time. Just make sure to take notice of the watchpoints. Don't forget to pin for later.
I hope you have enjoyed this story. Feel free to leave a comment or start a discussion. If you have made a dish from this site, I would love to know what you thought!
Leaving a comment and a star rating helps others decide if they should try my recipe. Plus, if you hit the social media share buttons, your friends may find a delicious new recipe or Thermomix Tip too!
If you want to be notified when a new recipe is released, sign up for my monthly newsletter. The form is also in the footer!
Thank you for stopping by,
Happy Cooking
j xx

Link Disclosure
From time to time, I recommend kitchen products and ingredients. These are always items I use and love! When I share a link to a product, you can rest assured that I have tested the item and genuinely love it! If you follow my link and purchase the item, in some cases, I will receive a commission for the referral.
While the commission may only be $1 or so, I value your support, and I take your trust very seriously.
By clicking on my link or selecting me as the referrer, "Julie Carlyle," you reward me with a small commission that helps support me and this website.
Your support keeps me cooking!


Jessica says
This recipe looks delish! Just wondering what your thoughts are on a chilli free version for kids? I would be making two batches of course as I could not stand to miss out on the chilli myself mmmmm
Julie Carlyle says
Hi Jessica, You would absolutely be able to leave out the chilli. It will just taste a little more like saur kraut. It would be super good for the kids to get their probiotics 🙂
Helen @ Fuss Free Flavours says
Seems like quite a skill to make your own Kimchi; I too would be worried about what I was growing! But having read your advise, it would seem the right equipment is essential and makes the job relatively easy. Looks and sounds like a delicious dish to enjoy.
Katie | Healthy Seasonal Recipes says
I made kimchi a long time ago, but it didn't come out very well. These instructions look a lot better! And the seasoning too for that matter. I couldn't find the Korean chili, so I skipped it. Not a good call. Ha ha.
Julie Carlyle says
It really is easy to make Katie, the chili is quite mild but it does give a lovely flavour to the Kimchi.
Brandi Crawford says
I love kimchi, but have never made my own. Your recipe looks fabulous!
Renee says
What a great recipe, I never used a thermomix but would love to try it it sounds great.
Patty says
Looks scrumptious, pity I don't own a Thermomix, makes me want to buy one!