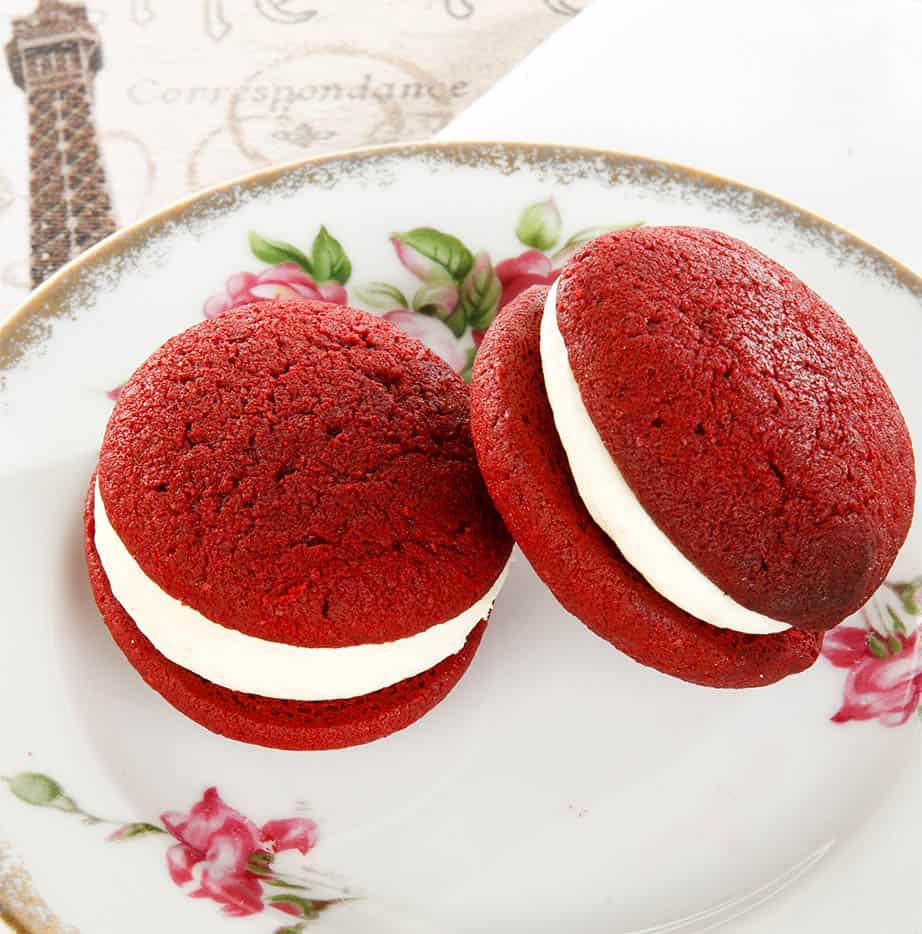
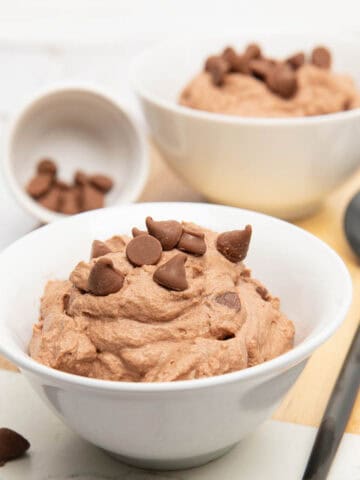
These cute red velvet whoopie pies are made by sandwiching soft, fluffy red velvet cake pillows either side of a luscious cream cheese filling.

I love making gorgeous treats that are beautifully photogenic. Red Velvet cake is definitely a recipe which looks and tastes amazing. I first shared this recipe in 2013 on my pre-Thermomix recipe site. It got a lot of love from readers so I decided to convert it for the Thermomix.
To make the recipe suitable I have converted the ingredients from cup measures to grams and changed the method to suit the Thermomix. Since not everyone has a Thermomix I have also shared the convention method below.
Red Velvet Cake Stand Mixer Method
Below are the instructions for making whoopie pies using a conventional stand mixer.
- Pre-heat oven to 170 degrees.
- Line 3 cookie trays with baking paper.
- In a stand mixer cream butter and sugars until light and fluffy.
- Add eggs one at a time mixing well in between each addition.
- With the mixer still on add vanilla and food colouring.
- In a large bowl combine flour, cocoa, baking powder and bicarb soda
- Scrape the butter and sugar mixture into the large bowl with the flour.
- Add the milk and fold through so all the ingredients are combined by hand.
- Drop teaspoons of the mixture onto the prepared trays leaving room for spreading.
- Bake for 10 mins or until the cakes are light and springy to touch.
- Cool for 5 minutes on the tray and then place on a wire rack.
- Repeat until all the mixture has been cooked.
- While the cakes are cooling prepare the cream cheese filling by beating all the ingredients together on high the frosting is light and fluffy.
- Place the frosting in a piping bag and filling half the whoopie pies with frosting. Match the frosted bottoms with tops of a similar size.
- Store the filled whoopie pies in an airtight container in the fridge. Place baking paper between the layers.
Step By Step Red Velvet Whoopie Pies
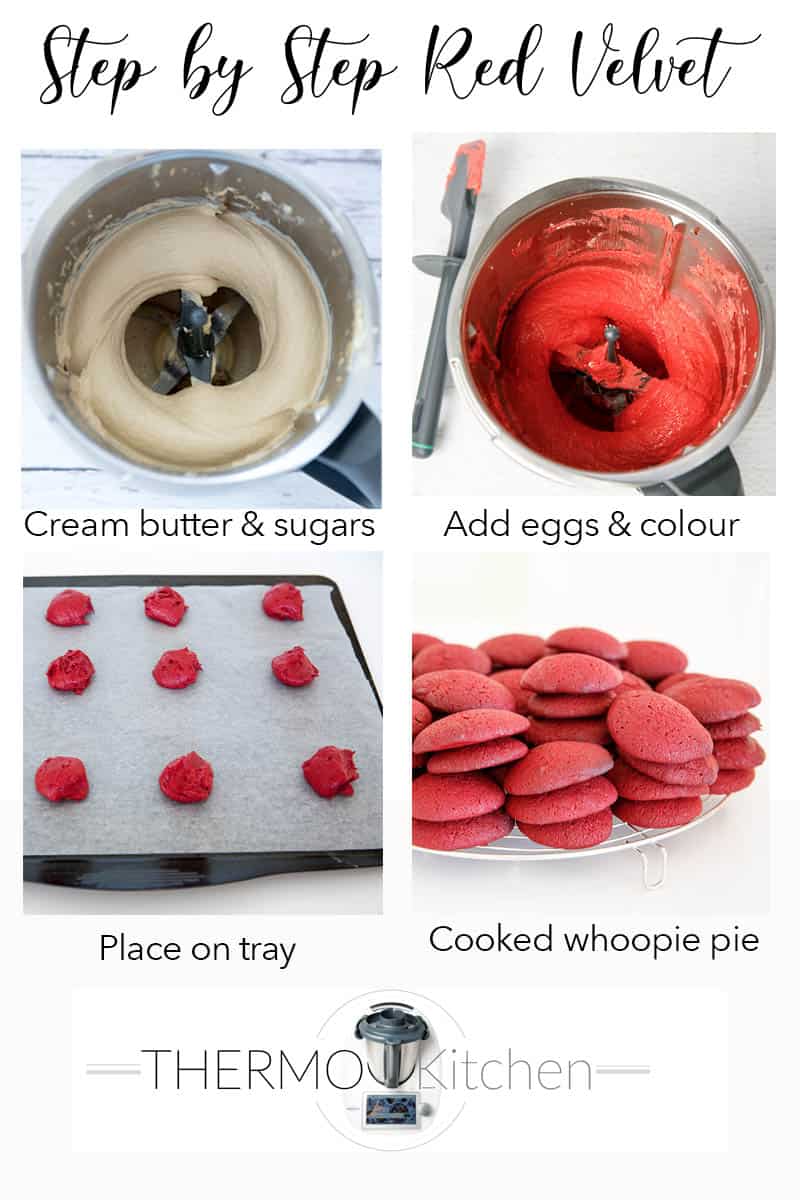
The image above shows a guide as to how far apart the whoopie pie batter should be placed on the prepared tray. The little cakes will expand in the oven.

Let's Connect!
Would you mind tagging me on social media if you make any of my Thermokitchen recipes! Chatting and seeing your pictures really makes my day. #Thermokitchen
I would love to share more delicious recipes with you. For Thermomix recipe inspiration LETS CONNECT on;
FACEBOOK
TWITTER INSTAGRAM PINTEREST

Red Velvet Whoopie Pie
Equipment
Ingredients
- 250 g salted butter room temp cubed
- 110 g brown sugar
- 230 g white sugar
- 2 eggs
- 4 teaspoon red food colouring
- 2 teaspoon vanilla essence
- 480 g plain flour
- 45 g Dutch process chocolate powder
- 1 teaspoon baking powder
- ½ teaspoon bicarb soda
- 250 g milk
Cream Cheese Filling
- 125 g cream cheese
- 20 g butter
- 1 teaspoon vanilla
- 2 cups icing sugar
Instructions
- Line 3 baking trays with baking paper.
- Pre heat oven to 180 degrees
- Add butter to TM bowl. Mix 10 Sec/Speed 5.5
- Scrape down the bowl and add butterfly.
- Add the sugars to the bowl. Whip 1 min/Speed 4.
- Scrape down bowl. Add eggs and vanilla. Whip 1 min/Speed 4.
- Add all remaining ingredients. Combine 1 min/Speed 3.
- Scrape down the bowl. Mix 30 sec/Speed 4.
- Drop spoonfuls of the batter onto the prepared trays.
- Cook for 10-15 minutes or until springy when touched.
- Cool for 5 minutes on tray and then place on a cooling rack.
- Repeat the cooking process until all the batter is finished.
Cream Cheese Filling
- Add a clean butterfly to the TM Bowl.
- Add cream cheese, butter and vanilla to a clean TM Bowl. Whip 20 sec/Speed 4.
- Add icing sugar to the cream cheese. Beat 1 min/Speed 4.
- Once the whoopie pies are cooled spread the frosting over half the cakes.
- Match the whoopie pies with other halves of a similar size.
- Store the cakes in a container in the fridge. Each layer should be seperated by baking paper to prevent sticking.
Notes
Log in: Then add your own recipe notes below!
Nutrition
I really hope you try making these red velvet whoopie pies. Please come back and leave me a comment. I love hearing from everyone 🙂Rating the recipe once you've made the dish helps other readers decide whether to make my recipe.
Happy Cooking
j

Leigh Gibson says
Hi Julie. I made these a while ago and they were delicious.
I’m making mini ones today to turn into ladybugs for my granddaughters ladybug themed first birthday ☺️
Julie Carlyle says
Hi Leigh
Thank you for coming back and leaving a message
Mini ones will be beautiful for your granddaiughters ladybug birthday! I can just imagine them! What a super idea!!
Have a lovely day
Julie xx
Julie Carlyle says
Leigh
OMG that would be so totally cute!
Julie
Glenys Castle says
Hi Julie just made the whoopie pies very are very yum .
Julie Carlyle says
Hi Glenys
Haha! Yes I love this recipe, something completely different. They didn't seem to catch on like they did in America though. Nevermind, you and I can eat them all!
Julie