Estimated reading time: 4 minutes
Thermomix "No-Bake" Salted Caramel Cheesecake is a super quick and super easy recipe that's perfect for making in individual serves. It isn't a sliced cheesecake so it doesn't need to be cooked or refrigerated overnight.
I first shared the recipe on my previous website, Gourmet Getaways and it's been one of the most popular recipes. Recently a Thermomix user asked me to convert the recipe for her. It is even easier to make in the Thermomix.
Whilst the recipe is simple the flavour is fabulous! I promise it's SO good you may hate me forever because it tastes amazing and, like most recipes I make, eats a cheat version of a cheesecake. I call it that because it tastes great but is thrown together with absolutely no fuss. Plus, there is no worry over whether it will set.
I have made this recipe a number of different ways over the years so I will share all the various serving options.
Serving Styles
This is a really versatile dessert. Choosing how you serve the cheesecake will depend on the type of event you're holding.
- Formal Setting
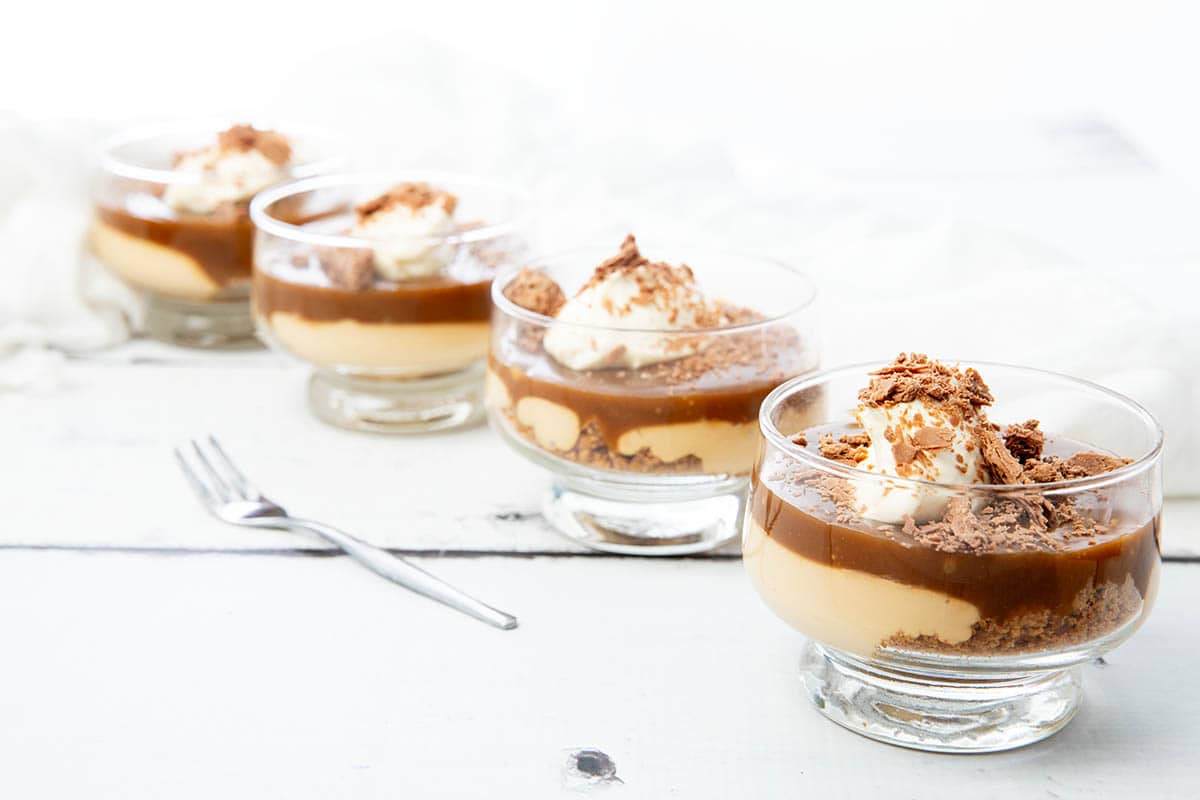
To serve these as a sit-down dessert I have opted for using glass bowls or balloon wine glasses. This makes the dessert more elegant. I have topped it with chantilly cream and a shaving of chocolate.
- Buffet Style
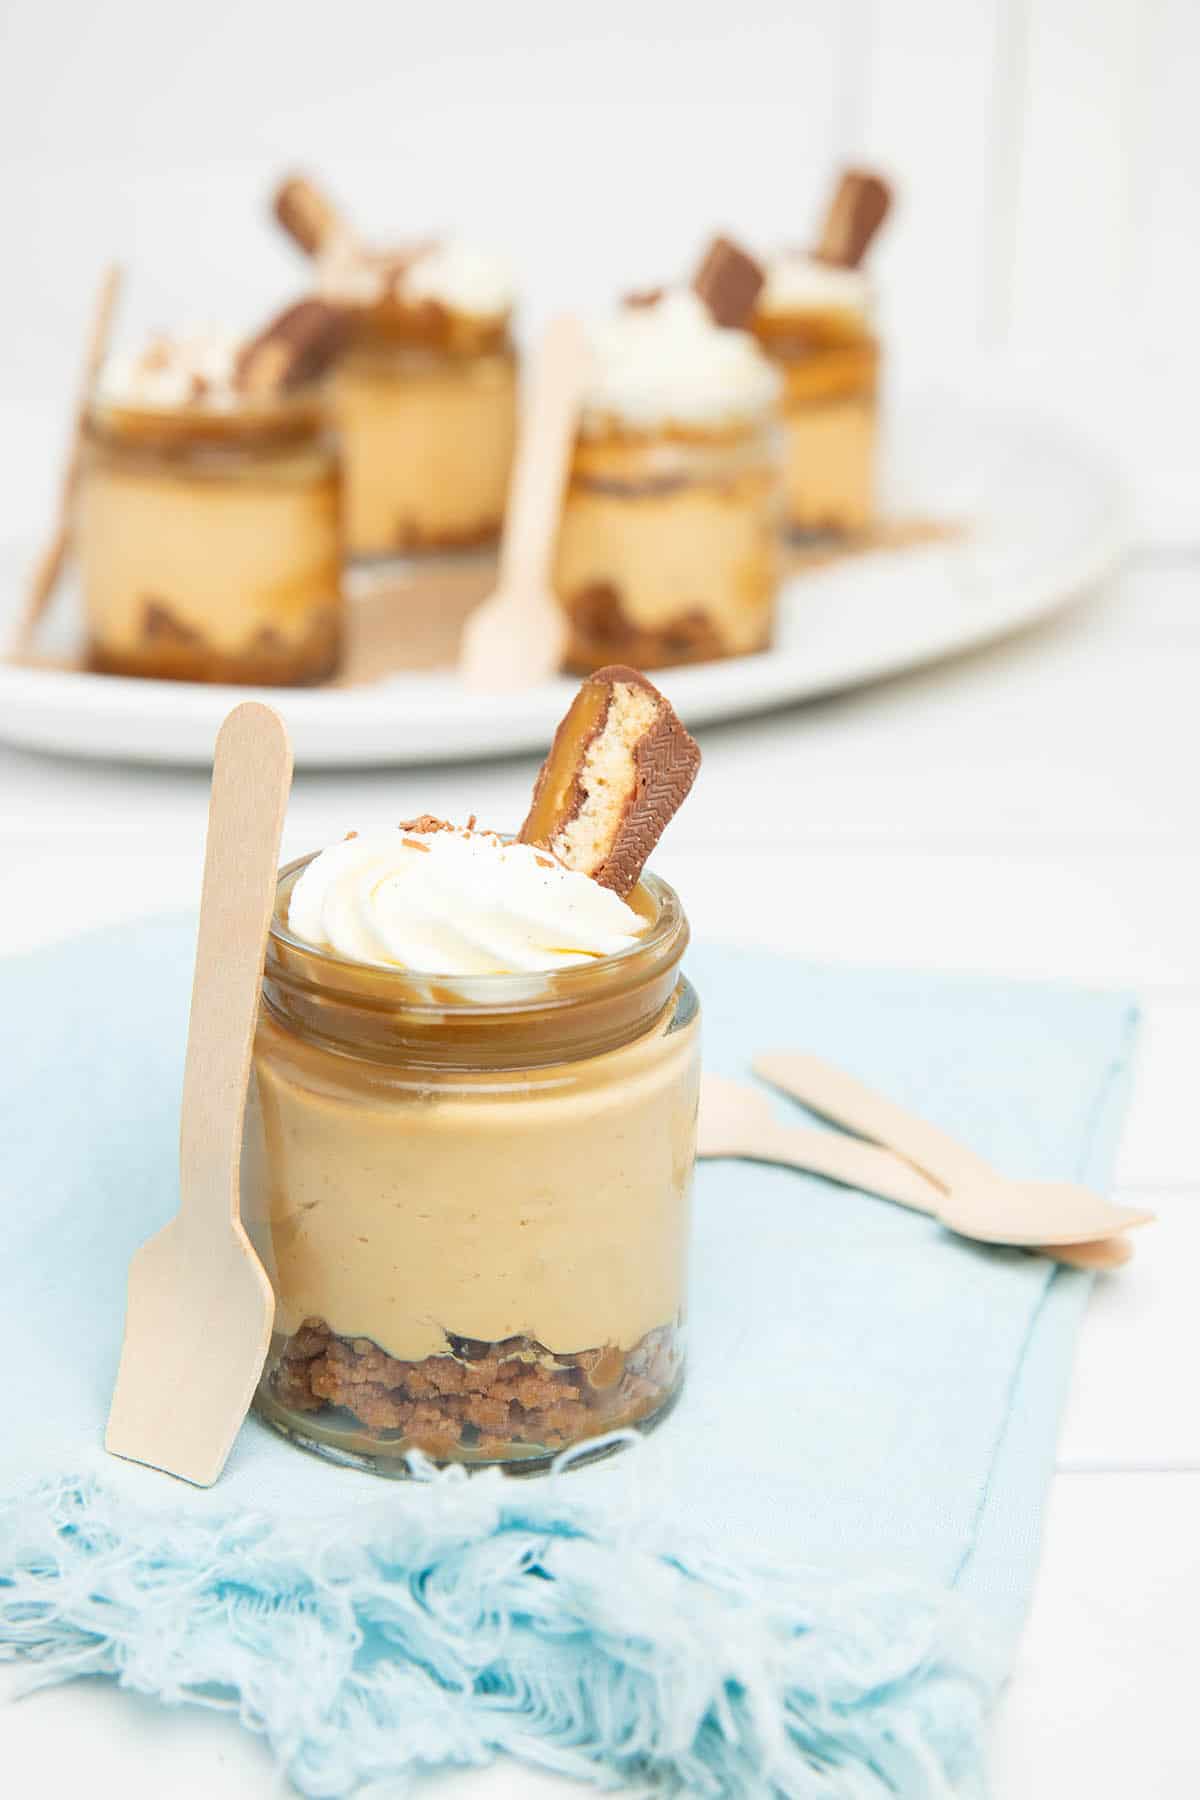
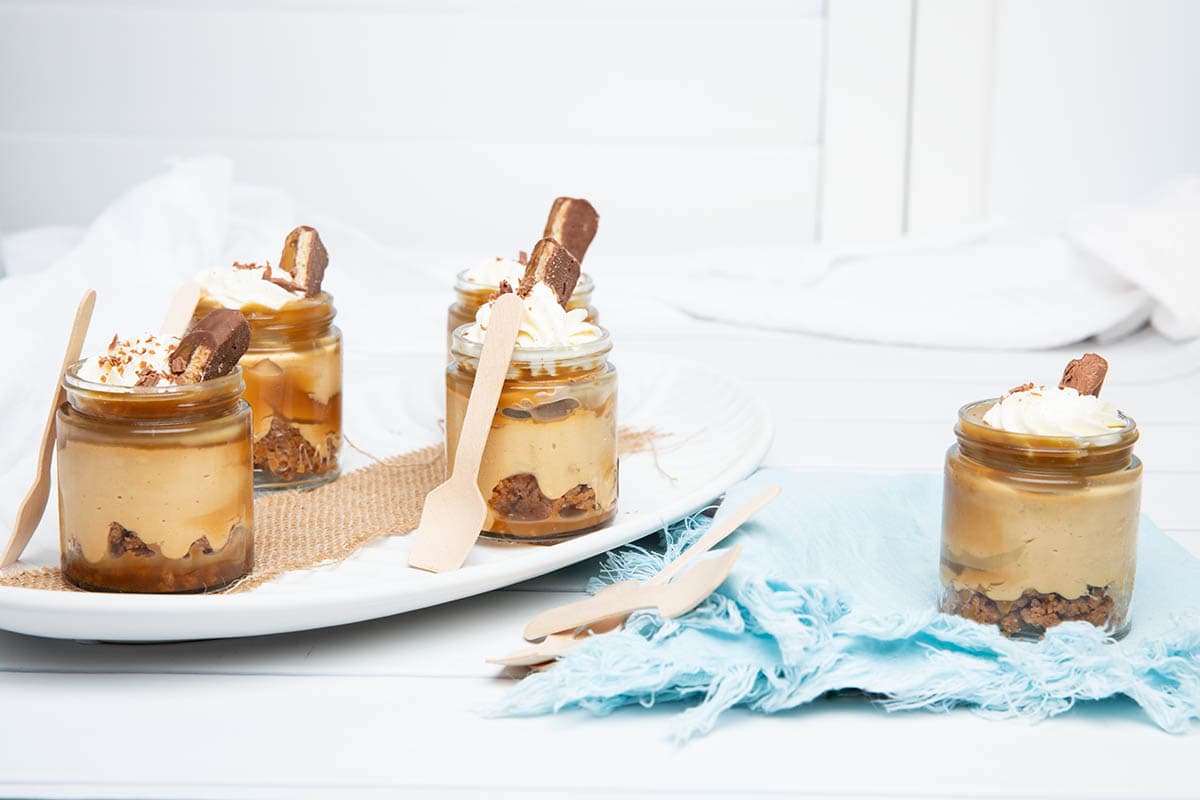
Serving the cheesecake in little jam jars and topping them with chantilly cream and a wedge of Twix bar makes this a rustic but cute dessert, fit for the buffet table. Once the caramel layer has been added, seal the jars with the lid. Leave the final decorating until just before serving.
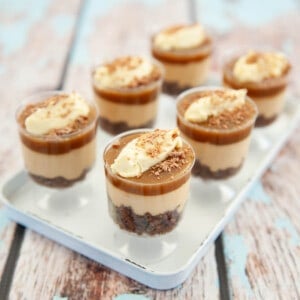
- BBQ - Bring a Plate Style
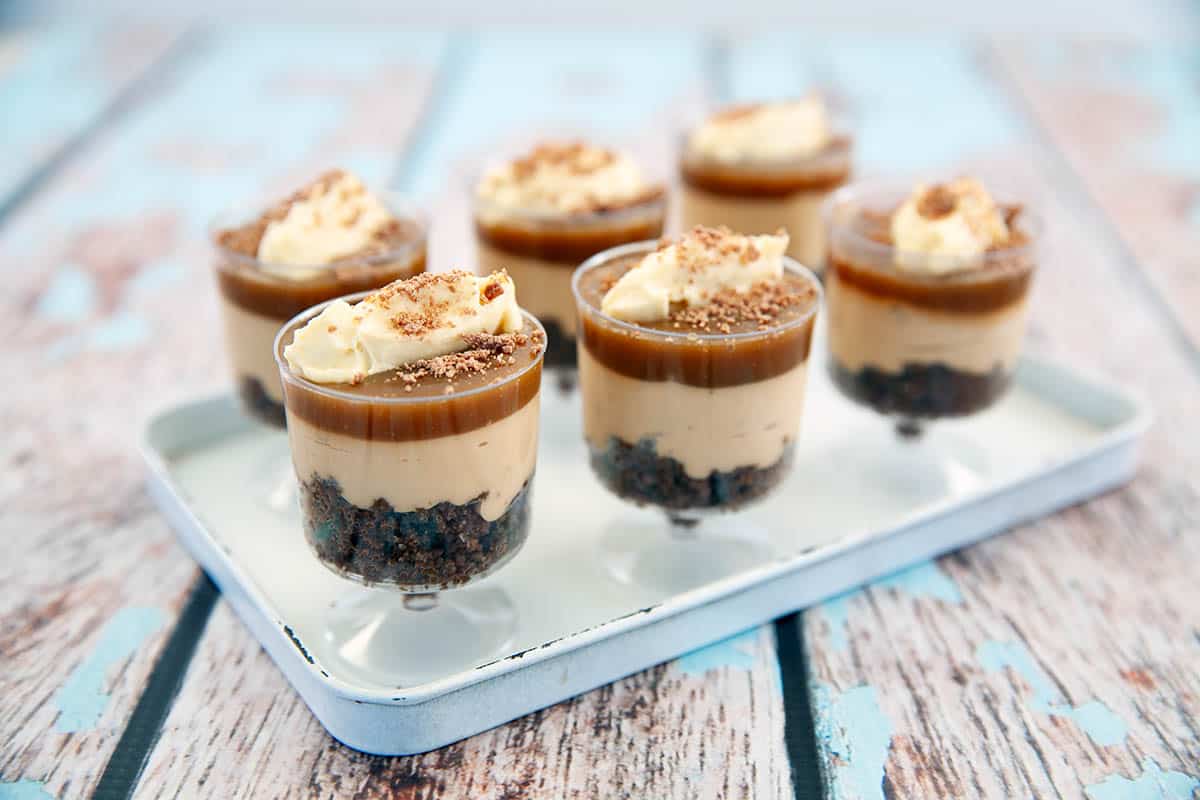
When you're asked to bring a plate the ideal dessert is one you can set down and people can help themselves. I like my contributions to be in disposable packaging so I don't contribute to any washing up and I don't have to track down my crockery or glassware. These plastic wine tasters are the perfect size to allow guests to try the Salted Caramel Cheesecake and still have room for other desserts. Although I usually find they keep coming back for more!
Step-By-Step Video Instructions
I love cheesecakes, and this Salted Caramel Cheesecake is one of my favourite recipes so I'm always happy to make it. For a little bit of fun, I made the recipe LIVE on FB! If you're unsure of any instructions take a look at the Live broadcast.
Video Using Jam Jars & Toppings
This video shows more details on how to use jam jars for your cheesecake and topping with piped chantilly cream and Twix bars.
FAQ Thermomix Cheesecake
No, if you don't wish to use the gelatin you can leave it out however the consistency will be a little different. The cheesecake will be a little less set and the caramel layer may seep into the cheesecake a little.
If you add the caramel sauce when it is too hot it will melt the cheesecake and seep into the layer.
Butternut biscuits make a nice substitute, but you can really choose any biscuit including the traditional cheesecake base of Nice biscuits.
Yes, the lemon juice cuts through some of the sweetness and adds the traditional cheesecake flavour. I wouldn't leave it out.
Once you add the caramel, leave the cheesecake for another 2 hours before adding the cream and toppings. Then serve.
The cheesecake can be kept for a week in the fridge. It is best to decorate them closer to the serving time.
Newsletter
Would you like to receive FREE Thermomix recipes in your inbox? Sign up to our email list and each month you will receive an email with lots of delicious Thermomix recipes to keep you inspired.
Let's Connect!
I share loads of great recipes on the website, but those who find out first are my special newsletter friends. You can even choose your favourite topics!
I also have a lively social community. Take a look at the Facebook Group page. It is a fabulous place to ask questions, join the chatter, and share images of recipes you have made! It helps inspire others to cook new and interesting dishes.
If you want more Magimix, Optimum or Thermomix recipe ideas or information, please follow the ThermoKitchen FB Page. I post everything I know here first!
GET INSPIRED;
FACEBOOK
TWITTER INSTAGRAM PINTEREST YOUTUBE
Thermomix Salted Caramel Cheesecake
Equipment
Ingredients
Biscuit Base
- 150 gm gingernut cookies
- 70 gm salted butter room temperature
- ½ teaspoon ground cinnamon
Cheesecake Filling
- 400 gm Philadelphia Cream Cheese
- 380 gm "Nestles" Caramel Top & Fill
- 1 Tbs lemon juice
- 1 teaspoon gelatin
- 60 ml boiling water
Caramel Sauce
- 1 cup 215g brown sugar
- ¾ cup 190g cream
- 60 gm 2 oz salted butter
- ½ teaspoon salt
Chantilly Cream
- 300 g cream
- 1 TBS icing sugar
- 1 teaspoon vanilla paste
Garnish
- 6 Twix Sticks cut in half on the diagonal
Instructions
Biscuit Base
- Place the ginger nut cookies and cinnamon into TM. Blitz 12 sec/Speed 9.150 gm gingernut cookies, ½ teaspoon ground cinnamon
- Add the butter. Melt 1 min/100 degrees/Speed 3.70 gm salted butter
- Spoon base loosely into the serving glasses.
Cheesecake Layer
- Combine the hot water and gelatine in a small glass. Stir until smooth.1 teaspoon gelatin, 60 ml boiling water
- Place the Nestle Caramel "Top & Fill", cream cheese, lemon and gelatine in TM. 10 sec/Speed 6.400 gm Philadelphia Cream Cheese, 380 gm "Nestles" Caramel Top & Fill, 1 Tbs lemon juice
- Scrape down the bowl and repeat. 5sec/Speed 6.
- Pour the filling into the serving glasses to form a second layer.
- Refrigerate the cheesecakes for at least 2 -3 hours prior to adding the cooled caramel sauce.
Caramel Sauce
- Place all ingredients into a clean TM Bowl.1 cup 215g brown sugar, ¾ cup 190g cream, 60 gm 2 oz salted butter, ½ teaspoon salt
- Heat 6 min/120/ Speed 3.
- Remove the caramel from the heat. Allow the caramel to come to room temperature.
- Pour a thin layer of caramel over the cheesecakes
- Refrigerate and allow to completely set.
Chantilly Cream
- Add the butterfly whisk to the TM bowl.
- Add ingredients to the TM bowl. Whisk whilst watching on speed 3.5.300 g cream, 1 TBS icing sugar, 1 teaspoon vanilla paste
- Be very careful not to over-whisk. Stop when the cream holds peaks.
- Add the cream to a piping bag.
- Pipe a swirl on the set caramel layer.
Garnish
- Place half a Twix bar in the cheesecake.6 Twix Sticks
- Serve
Notes
Log in: Then add your own recipe notes below!
Nutrition
I hope you have enjoyed this story. Feel free to leave a comment or start a discussion. If you have made a dish from this site, I would love to know what you thought!
Leaving a comment and a star rating helps others decide if they should try my recipe. Plus, if you hit the social media share buttons, your friends may find a delicious new recipe or Thermomix Tip too!
If you want to be notified when a new recipe is released, sign up for my monthly newsletter. The form is also in the footer!
Thank you for stopping by,
Happy Cooking
j xx

Link Disclosure
From time to time I recommend kitchen products and ingredients. These are always items I use and love! When I share a link to a product you can rest assured that I have tested the item and genuinely love it! If you follow my link and purchase the item in some cases I will receive a commission for the referral.
Whilst the commission may only be $1 or so, I value your support, and I take your trust very seriously.
By clicking on my link, or selecting my name "Julie Carlyle" as the referer you reward me with a small commission that helps support me and this website.
Your support keeps me cooking!
Mel Lew says
This is the first 'no bake' cheesecake that has ever worked for me and it is a brilliant recipe. I've only made individual cakes and they disappear faster than I can make them. We're not ginger lovers so used butternut snaps instead for the base, but the best part of this recipe is the caramel - so delicious and hard to stop eating! Anyway, definitely recommend - thanks for the recipe, x
Julie Carlyle says
Hi Mel,
I am So pleased you enjoy the recipe! I have a bit of a sweet tooth so I find the caramel addictive too🤣🤣
Thank you for coming back and commenting.
Julie xx
Julie Carlyle says
Hi Mel
I am so pleased you enjoyed the recipe!
Sometimes I think it is just easier to take the pressure off and look for a different presentation idea.
The flavours would have been magic!
Juliexx
Linda says
Awesome recipe❤ loved by all. Not too sweet. The glasses i used were okay but i feel yours are perfect for this dessert. Would you mind me asking where you purchased them from please.
julie says
Please could u suggest an alternative to the Nestle caramel topping? ideally something purer😀
Julie Carlyle says
Hi Julie
The Caramel is made by heating condensed milk until it thickens into a caramel. Unfortunately, this is the only way to make it.
Julie
Daniel Franklin says
I have a terrible weakness for cheesecake. This one is excellent and very easy to make.
Julie Carlyle says
I LOVE cheesecake too 🙂 I'm so pleased you enjoyed my recipe xx
Justine says
Made this recipe for a family lunch and it was a hit! It was easy to prepare, looked fabulous and tasted great. I love it when a simple recipe (and my Thermomix) make me look like an awesome cook! Thanks
Julie Carlyle says
Hi Justine, I am so pleased that you and the family enjoyed the recipe xx Thanks so much for coming back and letting me know 😊