I never thought I would make a drip cake! They look beautiful and delicious but it was not on my bucket list. So much detail and effort gets put into making the cake look beautiful and elegant, but at any stage they can fail and end up looking like a 3 year got a new paint set and went mental on a birthday cake. So when my gorgeous, almost 10-year-old girl, showed me a picture of a drip cake and asked me if I could make it for her birthday I started having heart palpitations.
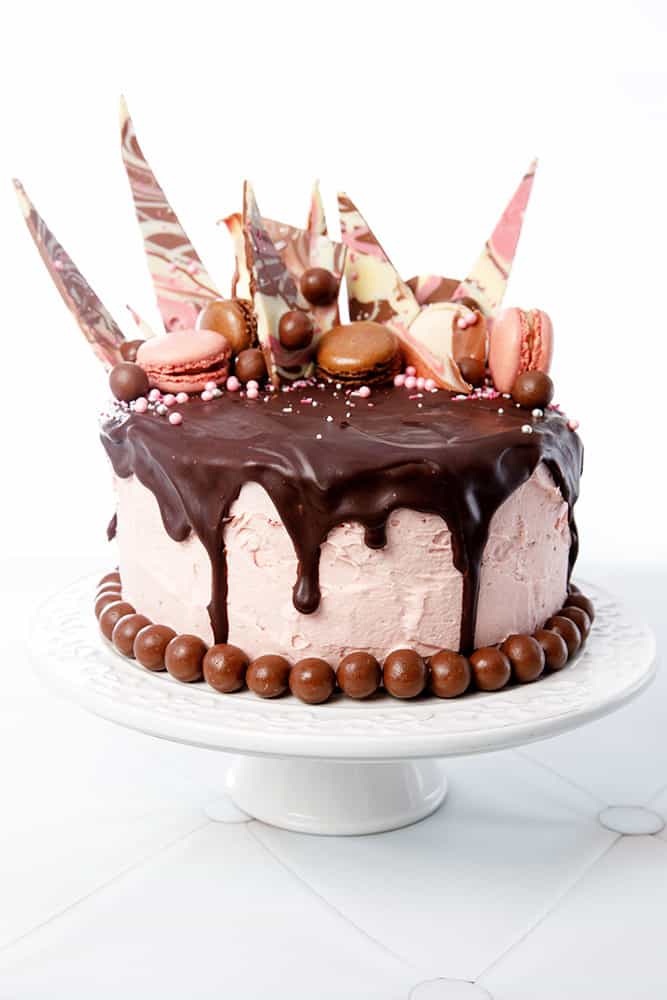
But, I did what any fearful, loving mum would do; I said yes and went into procrastination mode. I bought all the ingredients I thought I would need for the cake I envisaged and then put them in the pantry to wait for "inspiration".
Layered Chocolate Mud Drip Cake
Ingredients
Chocolate Mud Cake
- 250 gm butter room temperature
- 200 gm dark chocolate (broken into squares) 45% cocoa
- 450 gm sugar
- 250 gm milk
- 1 ¼ cup plain flour
- ¼ cup dutch process cocoa
- ½ cup SR flour
- 2 eggs
Buttercream Frosting
- 250 gm unsalted butter room temperature
- 100 gm strawberry jam or to taste
- 600 gm icing sugar
- 5 drops pink food colouring
Chocolate ganache
- 200 gm dark chocolate (broken into squares) 45% cocoa
- 140 gm pouring cream
Chocolate Shards
- 120 gm milk chocolate
- 200 gm white chocolate
- 3 drops pink food colouring
Decorations
- 1 teaspoon pink and white sprinkles
- 1 pkt maltteasers
- 1 Tbs pink pearl balls
- 1 Tbs silver pearl balls
- 3 macarons
Instructions
Chocolate Mud Cake
- Preheat fan forced oven to 170 degrees.
- Line 2 circular cake tins with baking paper.
- Add butter and chocolate to TM bowl. Chop 5 sec/Speed 9.
- Melt 5min/80degrees/Speed 1.
- Add sugar to the chocolate mixture. Combine 2 min/80 degrees/Speed 1. (NOTE: If the sugar doesn't melt or the chocolate gets stiff don't worry! It will still work.)
- Add the milk and eggs to the TM bowl. Blitz 30 sec/Speed 7.
- Add the flours and dutch process chocolate to the TM bowl. Combine 30 sec/ Speed 5.5. Repeat this step in the flour is not completely incorporated.
- Pour the batter into the prepared tins.
- Bake for 55 minutes or until a skewer comes out clean.
- Turn the cakes out onto a cooling rack. When cooled wrap the cakes in plastic and freeze overnight.
Strawberry Ganache - (Make the following Day)
- Add the butterfly to the TM bowl.
- Place the softened butter, food colouring and jam in the bowl.
- Combine 1min/Speed 3. (scrape down the bowl and restart as needed)
- Add the icing sugar to the mixture and beat. 3 min/Speed 3.
- Check the buttercream for flavour and consistancy. At this stage, you can add a drop of milk if the mixture is too thick or more jam if you prefer a more strawberry flavour.
Chocolate Ganache
- Place the chocolate in the TM bowl. Chop 5sec/Speed 9.
- Add the cream to the chocolate. Melt 2min/50 degrees/Speed 2.
Chocolate Shards
- Prepare a cookie sheet for the chocolate by covering it with baking paper.
- Place the milk chocolate into a glass bowl and melt. 1 minute in the microwave. Stir once during this time. Repeat for 30 seconds if necessary.
- Divided the white chocolate into two glass bowls.
- Melt each for 1 minute in the microwave. Stir once during this time. Repeat for 30 seconds if necessary.
- Pour the milk chocolate over the baking paper in a swirling pattern.
- Pour one of the white chocolate bowls over the baking sheet continuing the swirling pattern.
- Add the pink food colour to the final bowl of white chocolate and quickly pour this over the baking paper.
- Scatter sprinkles, cake decorating pearls of Maltteasers over the chocolate then refrigerate.
Assembly Instructions
- Complete assembly instructions and tips are in the story 🙂Happy cake making!
Notes
The day before her birthday I started to panic and decided I should at least make the chocolate mud cake. Mud cake is something I can almost make in my sleep. I have a fabulous, easy recipe that never fails me. The cake is best made the day before so that it can be frozen overnight. This makes icing with the buttercream easier. The buttercream will thicken as you ice the cake making it easier to get it on the sides. It also reduces the crumbliness of the cake, so you don't tend to get crumbs in the buttercream layer.
Tip 1. Any cake that needs a buttercream icing is best made the day before and frozen overnight.
With day ones cooking activities complete I put the cake in the freezer and checked my decorating supplies. The sprinkles and pink pearls were still in the pantry. The block of white chocolate and milk chocolate were both missing! I went back out to the shops and replenished the pantry. This time I found better hiding spaces.
The next day was Anais birthday! I managed to procrastinate until lunch time and then panic set in. In just 3 hours Anais would be home from school! The cake decorating needed to start NOW! After a few deep breaths, I decided to take things in baby steps. My logic was, that if things went pear-shaped I could pull out and she would just have a frosted cake.
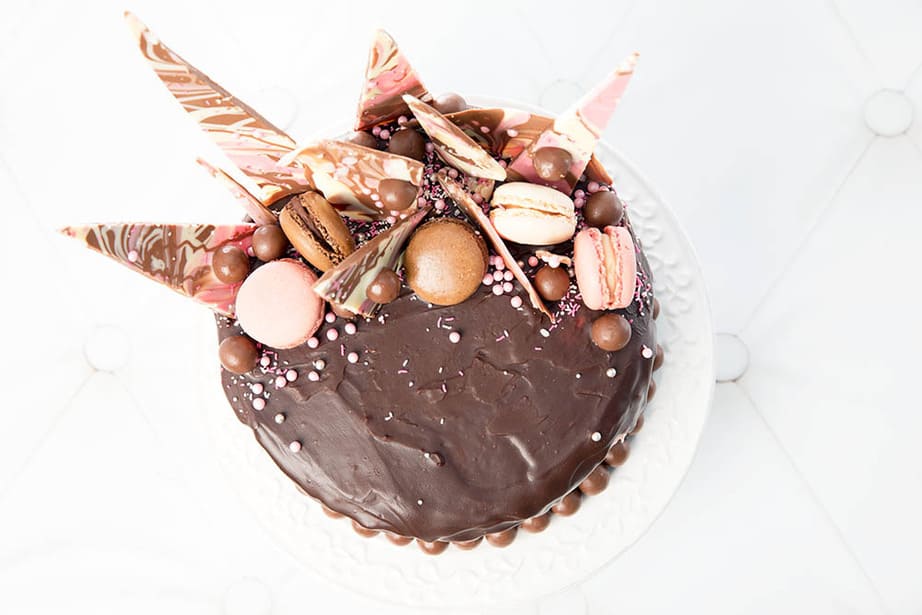
Drip Cake Assembly Instructions
1. Buttercream Stage
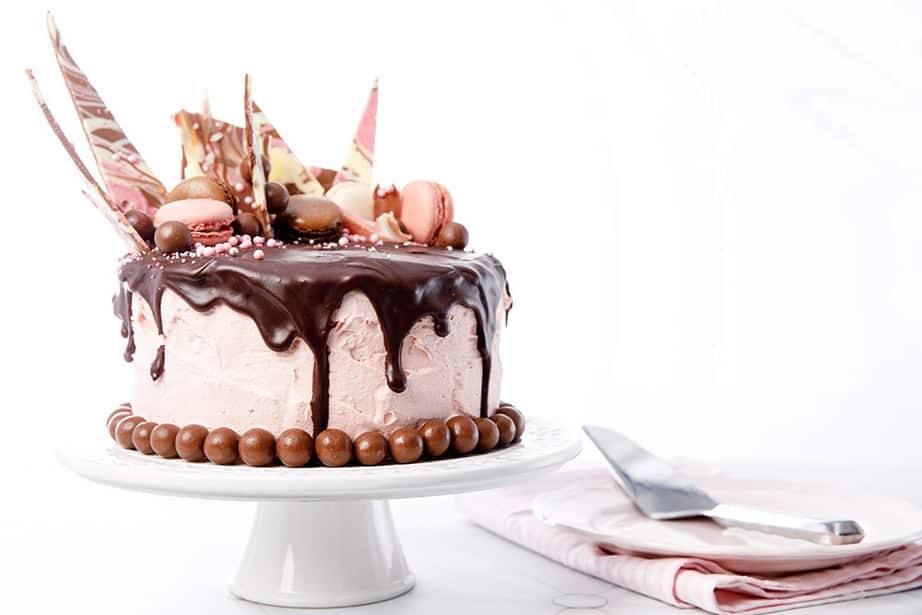
Chocolate and strawberry are a delicious combination. Rather than just tint the buttercream pink, I decided to add some strawberry jam to the mixture to give it some flavour. My drip cake was a layer cake so I smeared frosting over the top of the base cake and then added the top layer. It was really quite easy to coat the cake with buttercream.
Adding Maltteasers around the base of the cake allowed me to be a little less fussy about finishing the bottom of the cake perfectly.
The cake went back in the fridge so the buttercream frosting could set. At this stage, I was considering pouring myself a glass of wine. The drip cake was now at the extent of my cake-making ability. I was at the point where anything could go wrong.
Tip 2. The buttercream frosting needs to be rock hard before the ganache drip is added!
2. Ganache Stage
I didn't pour myself a glass of wine. Instead, I pressed on making the mammoth cake from hell. The ganache was made in the Thermomix too. This allowed me to keep the temperature of the melted chocolate low. The ganache needed to be fluid; but not so hot that it would melt the buttercream frosting or run all over the cake.
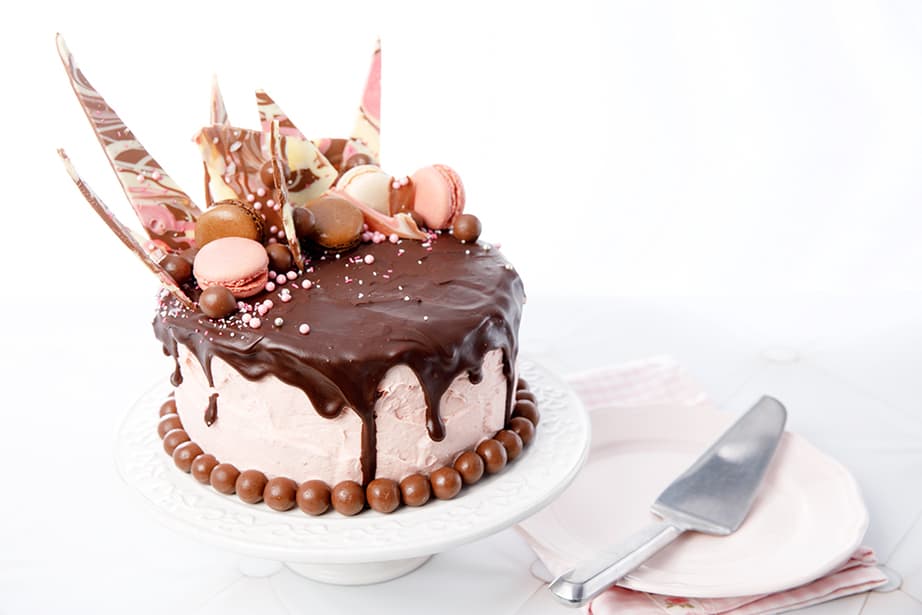
Freezing the cake overnight and then returning it to the fridge meant the buttercream set quickly. Once the ganache had been made the cake was ready for the drip layer. At this point, I seriously considered aborting the cake making process.
Regardless of my nerves I took a deep breath and poured the ganache onto the middle of the cake. I allowed the chocolate to make its own way to the sides of the cake. Once the chocolate flow had slowed I gently coaxed the chocolate from the centre of the cake out toward the sides. I needed to add a little more ganache to the centre of the cake to help the "spillover".
Tip 3. The trick to a natural looking drip cake is not touching the ganache near the edges of the cake. The ganache spillover needs to happen from the movement of chocolate coming from the centre of the cake outwards.
Once I had my ganache drip, I put the cake back in the fridge a breathed a massive sigh of relief.
3. Making Chocolate Shards
Making the chocolate shards was simple. I had no intention of tempering chocolate so I was completely confident in this step. Firstly, I lined a tray with baking paper, then added milk chocolate to 1 glass bowl and white chocolate to 2 more glass bowls. The chocolate was melted in the microwave then swirled onto the baking paper. I added pink colouring to the final bowl of white chocolate and swirled that through the other two colours. Malteteasers and pink sprinkles were added randomly to sections of the chocolate. Once I was happy with the effect the chocolate went into the fridge to harden.
When the chocolate sheet had set I used a hot knife to cut triangular shapes. The chocolate was then returned to the fridge.
5. Decorating the Cake
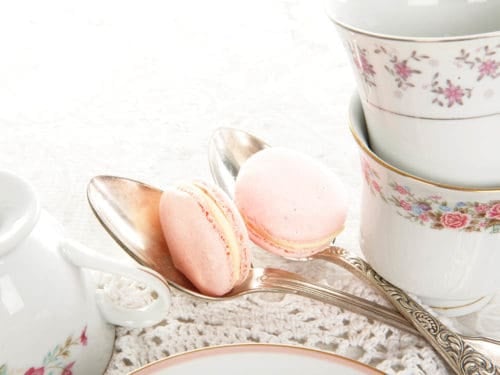
I think these macarons make an elegant addition to the top of a drip cake. If you're looking for a macaron recipe you can find my favourite macaron recipe here. Macarons are super easy to make in the Thermomix. If you're short on time just buy 3 or 4 macarons in the appropriate colours for the cake. Actually, buy an extra macaron for yourself, the sugar hit will help you get through the making of this monster cake.
Cake decorating is not my forte! I decided to look at a few cakes on google images. This was partly to procrastinate and partly because I was freaking out! I had my decorations ready to go, but I lacked the confidence in actually placing them on the cake. I noticed all the cakes I liked had one thing in common; the decorations were in a cluster and occupied about one-third of the cake.
Tip 4. Google pictures of drip cakes for inspiration!
At this stage I made my husband take a look at the cake. I was scared I would trash it from here on in!
One by one I added the decorations and happily, the cake came together nicely!
The moral of this very long story is; if I can make this cake, ANYONE can!
Have you made a drip cake? Would you ever make one of these cakes? Why not pin this picture for later.
Why not pin this picture for later.
If you would like more great Thermomix recipes, please follow the ThermoKitchen FB Page. I share loads of great recipes on the page. Our community group page also shares recipes from other fabulous Thermomix bloggers.
Thanks for stopping by!



Joan Davis says
Well you are absolutely amazing Julie, I just simple love what you have done. I just wish I was brave enough to tackle something like this.
The prettiest cake I’ve ever seen 💕
Julie Carlyle says
Oh Thank you so much Joan 🙂
Jen Bray says
I’d give this six stars if I could! Made a double batch of the chocolate mud cake in tm5. Really needed to add the flour to the choc mix in a large mixing bowl. Great instructions & tips. I made a white choc ganache(800g white choc) to cover & later the cake.
Jess says
Why didn't you include any photos of the cake itself? I wouldve liked to see the density and crumb that your reipe produces.
Julie Carlyle says
Hi Jess
Sorry I didn't take any photos of the cut cake. This was my daughter's birthday cake that we took with us to her party. The pictures that I took were before we left for the party in a studio setup I use for all my images. I didn't want to cut the cake at home before her party. She cut the cake later that evening at the party and it would not have been appropriate to have a piece missing or to stop the party to take pictures before serving the cake.
Trust me, the cake is my go-to cake, and there wasn't any leftover.
Julie
sashatil says
Hi. Just a tip for everyone... I made a drip cake a couple of days ago, and after a lot of research online about how to get the perfect drip, it's to use a spoon with the ganache on and drop small amounts round the edge of the cake so they drip down the side of the cake evenly - to have shorter drips you obviously put a smaller amount of the spoon. It's only once that's finished that you pour the ganache carefully onto the rest of the top of the cake. This way you get perfect drips as opposed to trying to encourage it to drip all the way from the centre of the cake...if that makes sense!
If the ganache is too warm it'll run down the sides and create a puddle, but if it's too cool then it'll just create stumpy drips which don't look so good.
Hope that helps 🙂
Ricca says
Hi,
May I know what is pouring cream? is it heavy cream?
Ricca says
Hi, i intedn to make it fo rmy girl bday too.. the milk you mentione int he ingredients list, is it milk powder or condensed milk or fresh milk?
Julie Carlyle says
Hi Ricca
The milk mentioned in the ingredients is milk. Just regular milk.
Thanks julie
Rebekah says
Hello, other than for decorating purposes do I need to freeze it? I just want a yummy mud cake recipe.
Thanks,
Rebekah
Julie Carlyle says
Hi Rebekah, The freezing stage is only for decorating the cake easily. You can skip this completely if you're not doing any elaborate decorating. You could just pour a ganache icing over the cake 🙂
Chloe says
May be a silly question but do i I apply butter cream to a frozen cake, or let it defrost?!
Julie Carlyle says
Hi Chloe,
Thanks for messaging, it’s not a silly question at all. Frost the cake while it’s frozen. Doing this makes it much easier to handle and you get less crumbs in the icing and a neater finish. Also the frosting hardens a bit quicker making it easier to “stick” on the cake and get smooth.
Happy Cooking
J
red says
Hi there - what size cake tins did you use? Do you think the cake recipe could be doubled or would I need to do two batches (I'm baking for my son's birthday - he's invited 40 kids!)
Julie Carlyle says
Hi Red, I will measure it this morning for you ?? You could Double the mixture for the first part of the cake. Before you add the flour you would be best transferring the batter into a large mixing bowl and combining the flour by hand.
Kristie says
How did you stick the decorations on? While the chocolate was still wet? The cake looks awesome
Julie Carlyle says
Hi Kristie, If you add the decorations as soon as you ice the cake they will stick to the icing well. Good luck, I hope you enjoy the recipe 🙂
Trina says
If I made this cake Friday night can I freeze it and ice Saturday and decorate Sunday morning for Sunday party? I'm thinking of giving it a go right now
Julie Carlyle says
Hi Trina, Yes! The cake can stay frozen for as long as you like ???? I did this one over a few days also! Good luck ????