
Estimated reading time: 13 minutes
The Thermomix cutter has made meal prep even easier, no matter which Thermomix model you own! My ultimate cutter guide will make sure you purchase the correct Thermomix Cutter for the TM5 or TM6. Or the new cutter plus, for your TM7. Each Thermomix model is a little bit different. I will show you exactly how to use it regardless of your Thermomix model. I will even give you a few delicious high-fibre recipes to get started on.
Before we look at safety tips, recipes, or automated cutter functions lets decide which cutter is suitable for your Thermomix.
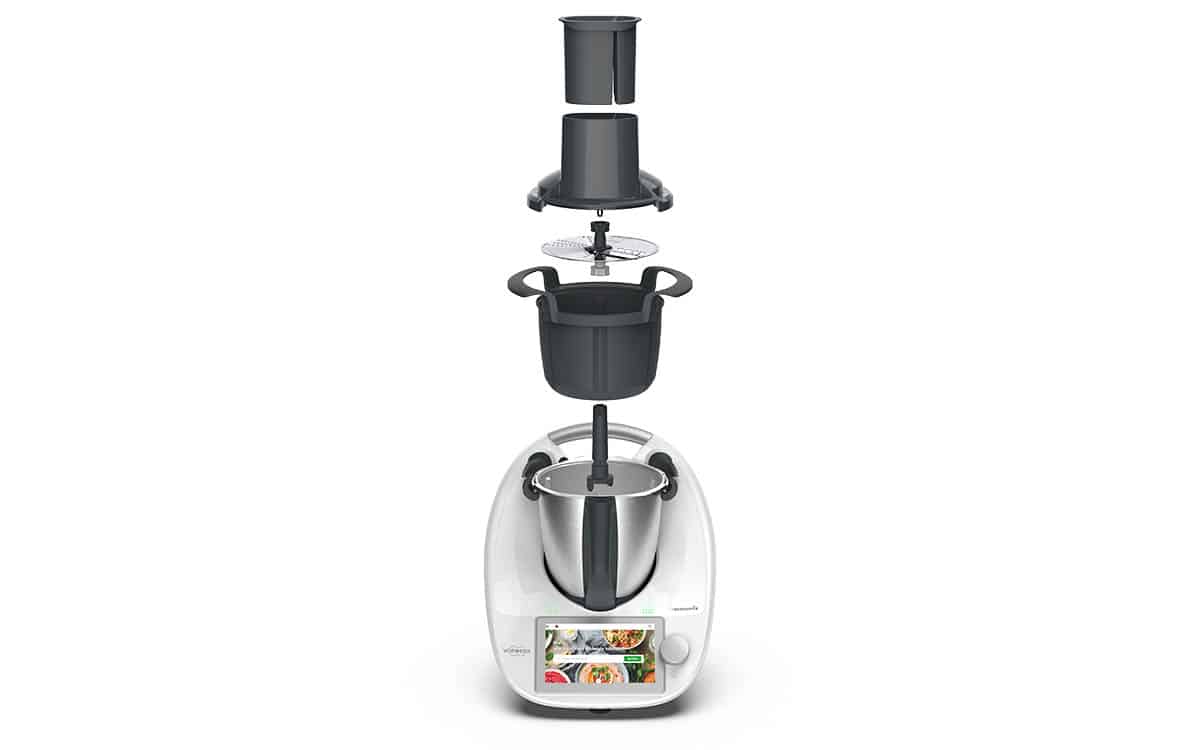
Table of contents
- Which Thermomix Cutter Attachment Do You Need?
- Thermomix Cutter Guide: How to Assemble the Attachment
- TM5 Manual Cutter Mode
- TM6 Automated Cutter Mode: Screen controls
- TM6 Cutter Video
- TM7 Automated Cutter Plus Mode
- Thermomix Cutter Guide Related Links
- Pro Tips - Troubleshooting Thermomix Cutter Guide
- What Recipes Use the Cutter or Cutter Plus
- Where to Buy Thermomix Cutter or Cutter Plus
- FAQ Thermomix Cutter & Cutter+
Key Takeaways
- This Thermomix Cutter Guide helps you choose the right cutter for TM5, TM6, or TM7 models.
- The Standard Cutter is for TM5 and TM6, while the Cutter Plus is specifically for TM7 with additional spiralising features.
- Assemble the cutter by following simple steps, ensuring the disk is set correctly for slicing or grating.
- Use manual settings for TM5 and automated modes for TM6 and TM7 to operate the cutter effectively.
- Get tips on safely handling the cutter, troubleshooting issues, and delicious recipes for using your Thermomix Cutter.
Please note there may be affiliate links in this post. For more information see my disclosure page or the bottom of this article.
Which Thermomix Cutter Attachment Do You Need?
Before visiting the Mixshop to purchase your cutter attachment, you will need to know which model Thermomix you own.
Thermomix Cutter Standard
- Thermomix Colour: If your Thermomix is white, you most probably have a TM5 or TM6.
- The Cutter Design: The Standard Cutter is a 4-in-1 accessory designed exclusively for the TM5 and TM6.
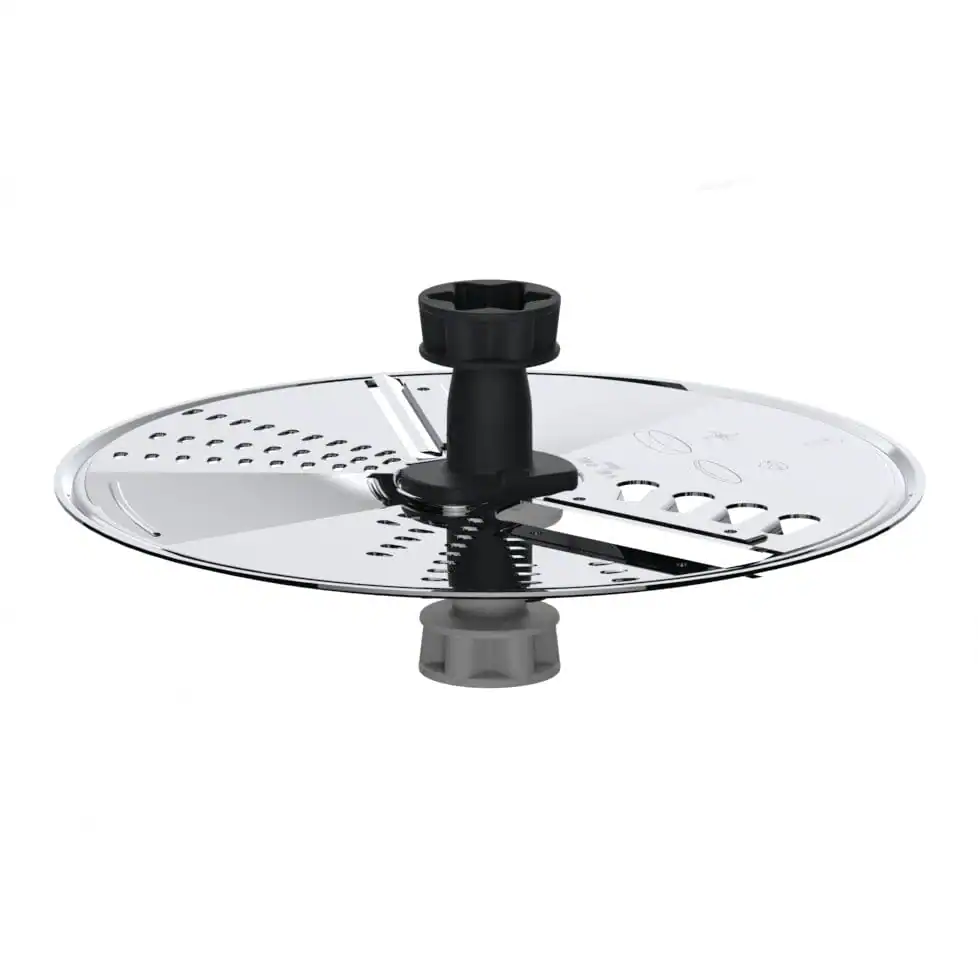
- The Disk Functions: The standard cutter uses a single reversible food processor-style disk.
- Side 1 (Grey): Placing the light grey side will allow it to grate
- Side 2 (Slate): and if the dark slate side is up, the cutter will slice.
- Purchasing: If you have a TM5 or TM6, you purchase the Thermomix cutter attachment.
- The Cutter Settings: using the cutter is different depending on whether you own a TM5 or a TM6, so stay with me; there is more information to follow.
Thermomix Cutter Plus (Cutter +)
- Thermomix Colour: If your Thermomix is brand new and black, you probably have the new TM7.
- The Cutter+ Design: this is a 6-in-1 accessory designed specifically to fit the bowl shape of the TM7.
- The Cutter Plus Functions: includes all the standard Cutter accessories in a size to fit the TM7. This allows it to slice and grate thick or thin, and has an additional attachment that can spiralise.
- The PLUS: is a spiraliser attachment allowing the TM7 to also make amazing zoodles.
- Purchasing: If you have the TM7, purchase the Thermomix Cutter Plus.
Thermomix Cutter Guide: How to Assemble the Attachment
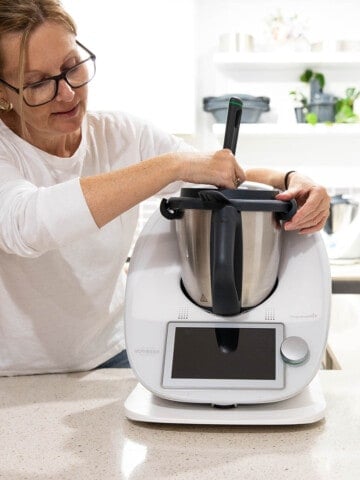
Putting the cutter together is the same regardless of which Thermomix model you own.
- Ensure your TM Bowl is clean and empty and positioned correctly on the base unit.
- Insert the drive shaft so the spikes go on either side of the blades. You will hear a click when it is inserted correctly.
- Place the cutter basket over the drive shaft. It will naturally fall into the correct position.
- Select which side of the disk you would like to use. Place the disk on the drive shaft with the chosen function facing up. (Light Grey = Grating, Slate = Slicing)
- Place the cutter lid on top with the chute closest to you. It should all fit into place neatly.
The Cutter Golden Rule: Match the Mode to Your Disk
This needs a little bit of explaining. The Thermomix software (modes) can't override a disk that has been placed incorrectly.
For example: If you have the grey side up for grating. You access the functions, modes and select slice. The food you place in the chute will be grated. This is because the function mode activates the drive shaft, the disc determines the outcome of the food, slice or grate.
Always double check your disc position.
Thermomix Cutter Disk
*Top Tip 1
Light Grey = G for Grating
Slate = S for Slicing
TM5 Manual Cutter Mode
The TM5 doesn't have an automated function for this mode. The cutter is controlled using your normal manual settings.
- Assemble the cutter attachment inside the TM5 Bowl.
- Ensure the disc is facing the correct way, depending on whether you want to slice or grate (see our Top Tip 1 above)
- Your Thermomix screen should be showing the 3 circles indicating manual mode.
- Tap the third circle for speed to activate it.
- Turn the dial to select Speed 4
- Forward mode gives a thick result to the slicing or grating functions
- Reverse mode gives a thin result to the slicing or grating function.
- Use the chute to process the food.
Thermomix Cutter Mode
*Top Tip 2
Never run the cutter for over 1 minute. You may overload the basket. To prevent this from happening, you could set
1 minute/Speed 4
TM6 Automated Cutter Mode: Screen controls
The TM6 features a specific mode for cutting and another mode for grating. To use the cutter, we access functions mode.
- Assemble the cutter inside the TM6 Bowl.
- Ensure the disc is facing the correct way, depending on whether you want to slice or grate (see our Top Tip 1 above)
- Swipe right across your home screen to access the modes menu.
- Scroll down to the bottom of the functions, and you will find an icon for slicing and another icon for grating.
- Select the function you want to use.
- The screen will prompt you to select a thick or thin texture.
- Turn the silver selector dial to make your selection.
- Use the chute to process the food.
TM6 Cutter Video
If you would like to see the TM5 TM6 Cutter in action, take a look at the video below.
TM7 Automated Cutter Plus Mode
The TM7 also features a specific mode for cutting, another mode for grating and an extra mode for spiralising. To use the cutter, we access the functions mode.
- Assemble the cutter inside the TM7 Bowl.
- Ensure the disc is facing the correct way, depending on whether you want to slice or grate (see our Top Tip 1 above)
- On your manual screen, choose the modes menu.
- Open the extra function hidden under the triangle facing down. You will find icons for slicing, grating and spiralising.
- Select the function you want to use.
- The screen will prompt you to select a thick or thin texture.
- When you're ready to process, select the green start on the screen.
- Use the chute to process the food.
- The cutter will automatically stop after 1 minute.
- Check the bowl isn't overful if you have more processing to do.
Thermomix Cutter Guide Related Links
Pro Tips - Troubleshooting Thermomix Cutter Guide
Fruit not slicing or grating properly
The cutter works best when using firm fruit. If the fruit is too soft, it may not be suitable for cutting or grating. I have given a brief list below. Use it as a guide to what may or may not work.
Apple: is the perfect texture for slicing and grating.
Pear: will slice well if it's not too ripe.
Strawberries: Place these in the small chute on the side for a nice slice. Position them in the chute before turning the machine on.
Kiwi Fruit: will slice if it's not too ripe.
Star fruit: These slice beautifully
Cheese is not slicing or grating properly
- Keep the cheese in the fridge until just before processing so it's firm.
- Choose hard cheese for the best results.
- Tasty cheese will grate and slice thickly if cold.
- Parmesan will grate and slice thin or thick if cold
- Swiss cheese will slice thick or thin if cold.
Zero Waste Cutting and Grating
Save your vegetable cutter scraps in a ziplock bag in the freezer for when you are ready to make your next vegetable stock paste.
How to Handle the Cutter Disk
Always hold on to the cutter disk by the plastic grey and slate rim. The disc is very sharp and could easily injure fingers.
What Recipes Use the Cutter or Cutter Plus
Cutting & Slicing Mode - Thick and Thin
If you have ever used a mandolin to slice potatoes for a potato bake, you will be happy to know you can throw that kitchen accessory away once and for all when you purchase the Cutter Plus
The Cutter allows every Thermomix from TM5 to the TM7 to behave like a food processor. Simply drop the potato, apple, beetroot, pumpkin, or whatever else you would like sliced into the chute. Perfect slices in seconds.
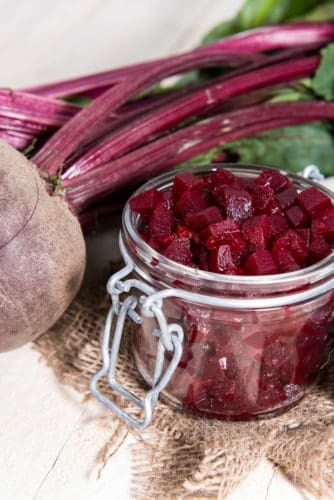
Here are some of my Thermomix Cutter recipes. I have made Pickled Beetroot using the slicer, although I cubed it in this image. The cute Pumpkin and Feta Pie using the thick slice mode, and some pretty Apple Roses Pastry Tarts using the thin mode. I never would have been able to slice the Fennel thinly by hand for the Orange and Fennel Salad



Grating Mode - Thick & Thin
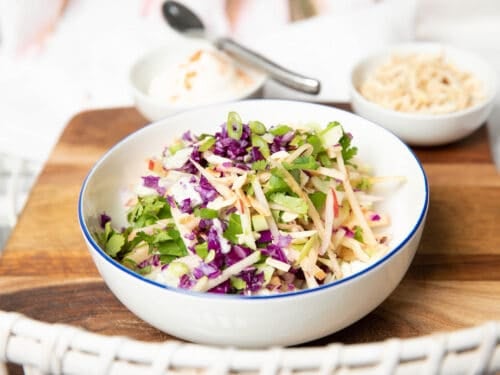
Simply by flipping over the food processor blade so the light grey side is up, you can grate to your heart's content.
I know I get excited about things that other people may not, but I have lost a lot of skin off my knuckles over the years grating cheese and carrots. So I love the Cutter Plus!
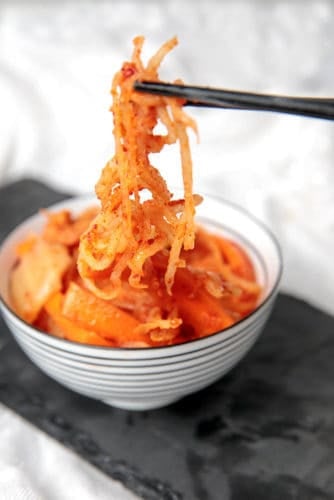
Think about how painless making Thermomix Coleslaw will be! I also make a variation called my Thermomix Apple Slaw. The apple goes through as a thick grate and adds a sweetness to the slaw that is amazing on pork burgers. In thin mode, it makes the perfect fine sandwich carrot. I have also used the cutter to make Basic Thermomix Kimchi.

Spiralising Mode
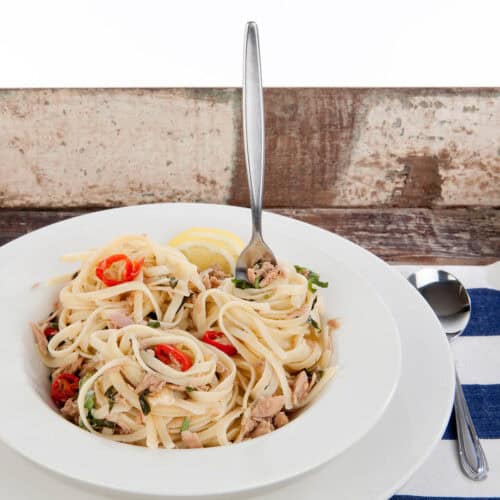
The Cutter Plus also opens up this mode for TM7 users. So 3 functions for the price of one accessory. The spiraliser utilises the same cutter bowl. Instead of the food processor blade, two spiraliser cartridges. Insert the green cartridge for zoodles. Once again, it is super easy to make thin zucchini or carrot zoodles. I swap these out when I make Thermomix Swedish Meatballs or Chilli Tuna Linguini. I have a picture of the zoodles in each of the recipes above. To make the classic chips on a stick that you get at festivals, use the black cartridge. This will give you a big flat spiral.


Where to Buy Thermomix Cutter or Cutter Plus
Accessories for the Thermomix should be purchased via the Mixshop. The Mixshop is the official Vorwerk supplier.
NOTE: Be very careful to always remove the drive shaft after using the Cutter or Cutter Plus. It can be easily left in the Thermomix Bowl and become a victim of the next smoothie.
FAQ Thermomix Cutter & Cutter+
Your cheese needs to be a firm cheese and cold. It is best to slice or grate cheese straight from the fridge
This is a very common problem, as it is easy to leave the drive shaft in the TM Bowl accidentally. The Mixshop has replacement shafts
No, you need to order the correct shaft for your machine.
Rub the stained area with a little bit of oil on absorbent paper before washing as usual
Yes, the cutter parts are all dishwasher safe. Use the top shelf.
Speed 4 is the correct speed when using the cutter with a TM5.
The TM5 needs to be on Speed 4 in forward mode.
The TM5 needs to be on Speed 4 in reverse mode.
Let's Connect!
I share loads of great recipes on the website, but those who find out first are my special newsletter friends. You can even choose your favourite topics!
I also have a lively social community. Take a look at the Facebook Group page. It is a fabulous place to ask questions, join the chatter, and share images of recipes you have made! It helps inspire others to cook new and interesting dishes.
If you want more Magimix, Optimum or Thermomix recipe ideas or information, please follow the ThermoKitchen FB Page. I post everything I know here first!
GET INSPIRED;
FACEBOOK
TWITTER INSTAGRAM PINTEREST YOUTUBE

Link Disclosure
From time to time, I recommend kitchen products and ingredients. These are always items I use and love! When I share a link to a product, you can rest assured that I have tested the item and genuinely love it! If you follow my link and purchase the item, in some cases, I will receive a commission for the referral.
While the commission may only be $1 or so, I value your support, and I take your trust very seriously.
By clicking on my link or selecting me as the referrer, "Julie Carlyle," you reward me with a small commission that helps support me and this website.
Your support keeps me cooking!

Leave a Reply