
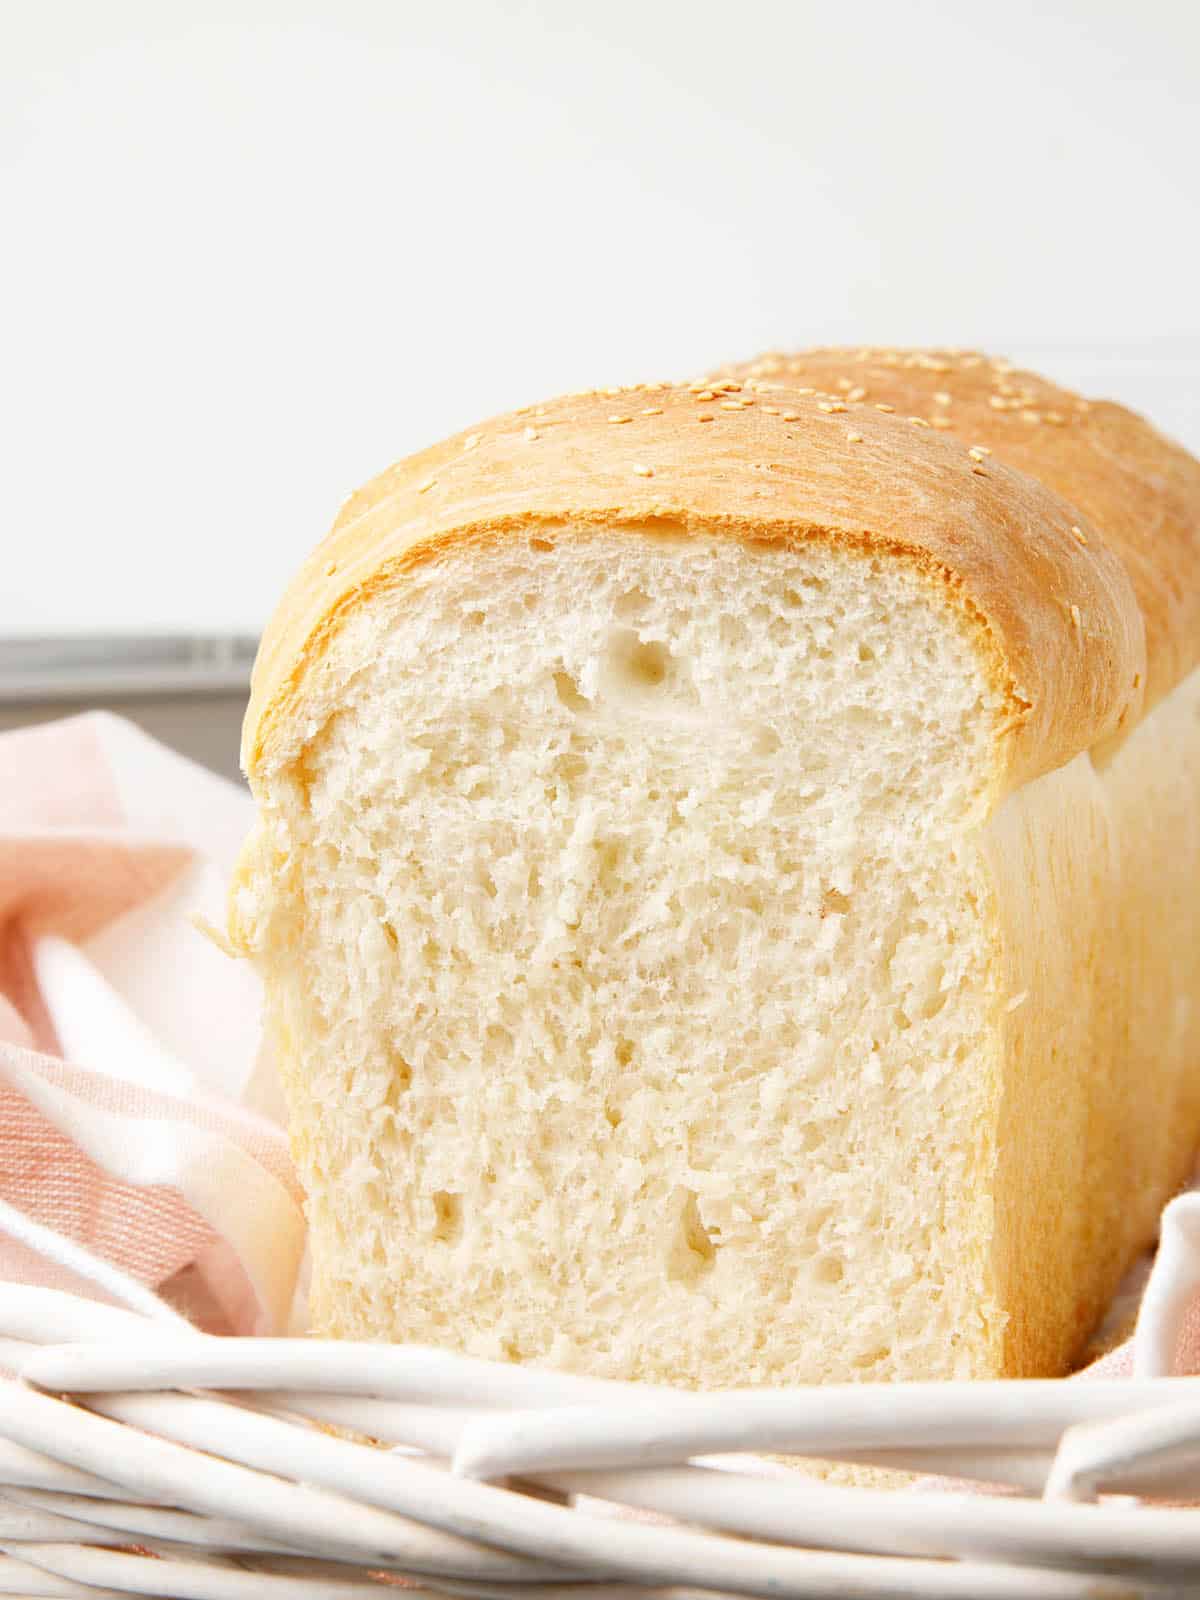
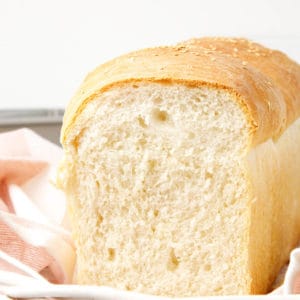
Thermomix bread making is as easy as adding the ingredients to the bowl and letting the Thermomix do the work. The key is having the best bread recipe! This recipe gives you the perfect soft sandwich loaf every time.
If you don't have a Thermomix, take a look at my 3 conventional bread-making methods. As a Thermomix consultant and someone who hosts cooking workshops, I have made bread with hundreds of people. I always use this bread recipe because it is fail-safe. It makes the perfect everyday white loaf for sandwiches.
Having a loaf of fresh bread baking in the house will make you feel like a kitchen girl boss! It's something that everyone assumes is hard, but once you master your first loaf of bread you will see how easy it is with the Thermomix.
You have to allow time for the dough to proof but the hands-on time is minimal. I like to start the bread in the Thermomix in the morning so the dough has time to proof. After proofing throughout the morning the dough can be baked for lunch.
Recipes you HAVE to make in your NEW Thermomix
There are a number of recipes that I feel are the cornerstone of learning just how much your Thermomix can do for you. These recipes show how versatile the machine is, and how many basic foods you can make in bulk without spending a lot of time in the kitchen.
I always encourage my new owners to try these as a skill-building exercise.
- Grate cheese - 250g cheese, cut in ¼. 4 sec/Speed 9.
- Greek Yoghurt Making
- Perfect Thermomix White Rice
- Cooking Spaghetti in the Thermomix
- Making Fluffy Mash Potato
- Pumpkin Soup
- Thermomix Bread
Basic Bread Ingredients
Bread in its most basic form can be as simple as flour and water, in the case of a flatbread. This recipe includes 6 ingredients, and they all have a specific purpose.
Flour
Bread baking requires flour with a high gluten content. Gluten is the protein found in wheat. Gluten gives the loaf its structure, it allows the bread to rise and not collapse while it's proofing. Bakers flour, or bread flour has a gluten content of 12-14%. For comparison, regular all-purpose flour has 8-11% gluten and cake flour 6%.
I'm based in Australia and I buy Wallaby Bakers Flour. It's available in Woolworths and Coles and the 5kg bags are very cost effective. I've discussed this further in my article "How to Save Money with your Thermomix"
Yeast
Yeast is a beautiful living organism that gives the bread the ability to rise. The bubbles in the dough occur when the dormant yeast becomes active and starts to expel carbon dioxide. I love this miraculous microbe, think of it as your baby. Nurture your baby and it will make a light airy loaf of bread for you.
I used dried yeast. Although dried yeast doesn't need any special treatment to activate the more love you show it the quicker your bread will prove. In cold weather, I add a few extra steps to activate even my dry yeast. Place the yeast in a cup of warm water from the recipe. Then add the sugar and stir. Allow this mixture to sit in a warm spot until it starts to look frothy. This gives the yeast a head start on becoming active and ready to feed on the flour.
If you are using fresh yeast you should always adopt this method. Take a look here for more information about fresh yeast.
Water
Simple tap water is fine for our Thermomix bread. Use warm water at approximately the same temperature you would use to bathe a baby. Yeast will start to die when the temperature is over 50 degrees Celsius. It is happiest between 25 - 35 degrees Celsius.
Bread Improver
Adding bread improver is optional but it improves the texture of the bread. The loaf will be lighter. The bread improver works by conditioning the flour, it helps strengthen the gluten bonds allowing the dough to hold more carbon dioxide. If you're concerned about chemicals in your bread you needn't worry. This ingredient is made from ascorbic acid, otherwise known as vitamin C
You can also substitute bread improver for two teaspoons of apple cider vinegar. The resultant loaf will have a slight sourdough taste.
Oil
Oil has a few functions in the bread recipe. It provides flavour, and helps the flour retain the gases it developed during the proving time ensuring a risen loaf. Once the bread is baked the oil also slows the degradation of the loaf. The crumb will stay soft longer and resist becoming stale.
Salt
This is another ingredient with a few functions. It provides flavour, and also helps strengthen and tighten the gluten matrix allowing the dough to retain the gases it developed during the proving time ensuring a risen loaf. The final function is as a fermentation inhibitor. It slows the yeast progression as it consumes the sugars in the flour. If it overconsumed the flour the loaf would lose structure. It's a balancing act.
Please remember that salt is a fermentation inhibitor and never add salt, yeast, and water together. They should always be separated by flour or the salt may kill the yeast.
Sugar
Although some recipes don't include sugar in a basic bread recipe I think it is important. Sugar is nutrition for the yeast. It is readily available for consumption and the yeast will become active more quickly when it's used.
As an immediate food source for the yeast the sugar is broken down first. Without sugar, the yeast will break down starch in the flour and convert it to glucose before any carbon dioxide (bubbles in the bread) can occur.
Bread Making Utensils
Once you have the Thermomix there isn't much else you need. Most kitchens will have the usual items such as a wire cooling rack, plastic wrap/ or a tea towel.
- A pre-warmed ThermoServer or Heat Proof Dish
- Jumbo Bread Tin
Thermomix Bread Tin
The Thermomix bread tin is recommended because it is the exact size needed for the recipe. The dough will form a perfect loaf in the Thermomix bread tin. Having the wrong size will mean dough is leftover if the bread tin is too small. If the Loaf tin is too large your loaf will never be proven to the top and you will end up with a sad low loaf that looks like it didn't rise and can't be cut into sandwich squares.
More Thermomix Bread Recipes
Once you have made your first loaf you will want to put your new skills to the test and try some more bread recipes.
- Quick Pizza Dough
- Buffalo Chicken Pizza
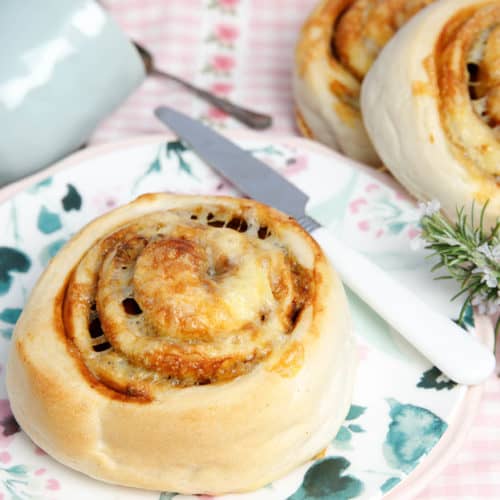
- Cheesymite Scrolls
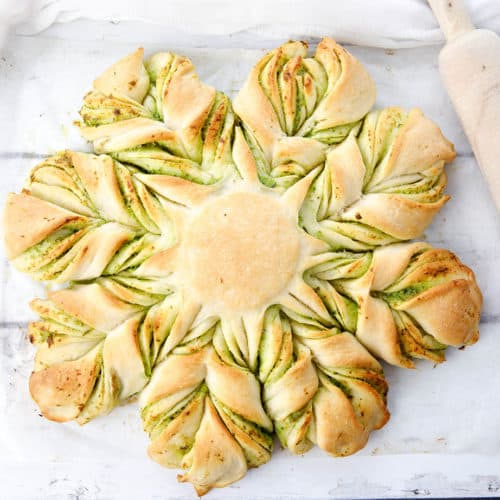
- Cheese & Garlic Star Bread
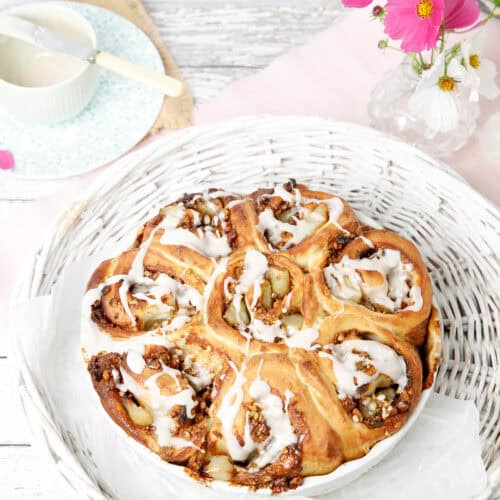
- Cinnamon Scrolls
- Hot Cross Buns
- Thermomix Bread
- Thermomix Bread


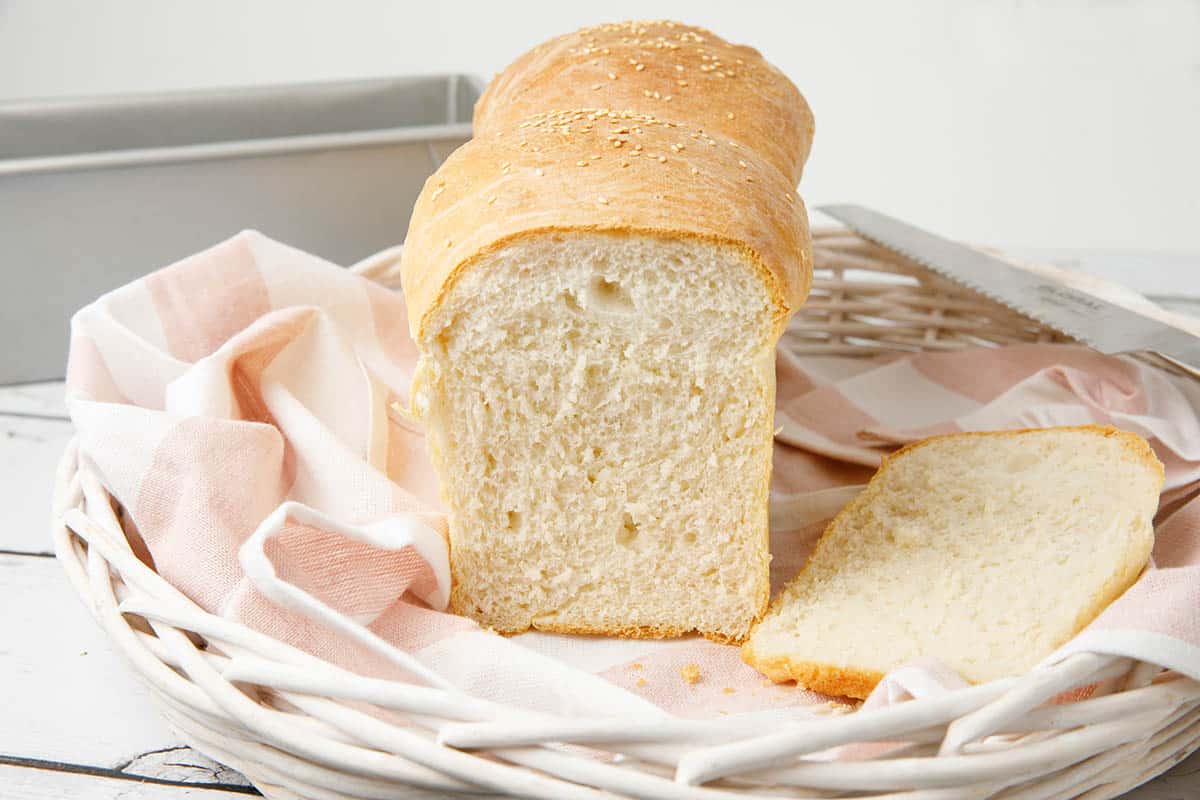
Loaf Tin V's Dutch Oven Free-form
This breadmaking method uses the Jumbo bread tin. The recipe provided is the perfect volume for the tin. I bake my bread in a tin for a uniform loaf shape. This is better when making sandwiches or toast.
The tin also means the outside texture of the loaf is the same as commercially prepared loaves.
The free-form Dutch oven technique also makes a beautiful loaf. This is better suited for a cheese platter or when you want a particularly crusty loaf. It's great for bruschetta or when the bread itself is a highlight.
Bread Making Steps
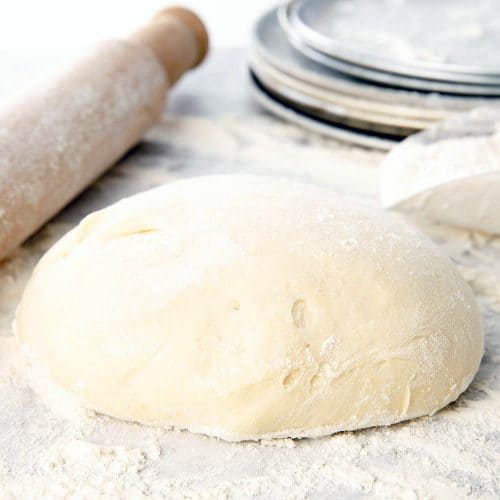
Step 1 - Make the Dough
Add the yeast, water, and sugar to the Thermomix. Warm for 1 min allowing time for the yeast to activate. On a cold day warm 10 - 15 minutes. Then add the remaining ingredients.
Select knead on the Thermomix. Kneading activates the gluten giving the bread structure.
Step 2 - Form a Ball - Proof the Dough
Remove the dough from the Thermomix and form a tight ball. Place the dough in a Pre-warm and lightly oil the Thermoserver.
Allow the dough to proof until it has doubled in size. The ThermoServer lid may be starting to lift.
Proofing time is dependent on temperature. I have an article on how to proof bread in winter.
Step 3 - Shaping the Dough
Remove the dough and place it on an oiled bench. Divide the dough into two. Form each ball so the top of the dough is pulled taut, and the seams are pulled under. Place each ball in the tin with space to expand.
Step 4 - Second Proof
Cover the bread with oil then with plastic wrap and a tea towel. Place it in a warm spot and allow it to prove again.
The bread must be allowed to prove until it has risen above the bread tin. It will not continue to rise when it's baking.
Step 5 - Bake the Bread
Place the tin on the middle shelf of the oven and bake for 30- 35 minutes or until golden brown. To test the loaf tap in the middle. It should sound hollow.
Step 6 - Allow to Cool
Remove the bread from the oven and turn it out, onto a wire rack to cool.

Thermomix Basic Bread FAQ
No, you don't, but it will improve the quality of the bread produced.
Any type of vinegar can be used as a replacement for bread improver.
Yes, you can use all-purpose flour but Baker's Flour is better. When using regular flour make sure to knead for 5 min. This will give the gluten a chance to develop into stronger bonds.
Two common problems are the yeast is too old, or the temperature is too cold and the yeast is just slow to react. If it's cold read How to Proof Dough Quickly in Winter If you think the yeast is too old you can test it.
Place two teaspoons of yeast in one cup of warm water. Then add one teaspoon of sugar and stir. Allow this mixture to sit in a warm spot until it's frothy. If it hasn't started to bubble after 30 minutes discard the water and buy new yeast.
If the yeast becomes frothy add the mixture to the Thermomix with an additional 60ml of warm water and commence the recipe from step 4. Below is an image of how active yeast should look in the sugar and water mix.
Recipe Serving Adjustments
Please note, that although the recipe card allows you to change the serving size and adjust the recipe this SHOULD NOT be done. Adjusting a Thermomix recipe will lead to unexpected and undesired outcomes. Please always stick to the exact ingredient quantities and times given in my recipe.
*The recipe card is generic and designed for all websites, this is a feature I can't remove.
Let's Connect!
I share loads of great recipes on the website, but those who find out first are my special newsletter friends. You can even choose your favourite topics!
I also have a lively social community. Take a look at the Facebook Group page. It is a fabulous place to ask questions, join the chatter, and share images of recipes you have made! It helps inspire others to cook new and interesting dishes.
If you want more Magimix, Optimum or Thermomix recipe ideas or information, please follow the ThermoKitchen FB Page. I post everything I know here first!
GET INSPIRED;
Thermomix Bread Recipe
Equipment
Ingredients
- 2 teaspoon dry yeast or 1 sachet
- 310 g warm water *see notes
- 1 teaspoon sugar optional
- 510 g Bakers Flour
- 2 teaspoon bread improver
- 1 TBS oil light oil minimum flavour
- 1 teaspoon salt
Instructions
- Boil the kettle and fill the Thermoserver with hot water.
- Lightly oil the Jumbo bread tin and reserve.
- Place the yeast, water, and sugar in the TM bowl. Warm 1 min/40 degrees/Speed 1.
- Add the remaining ingredients in the given order. Knead 2 min.
- Meanwhile, pour the water from the Thermoserver and dry it thoroughly. Lightly coat it in oil.
- Remove the dough from the bowl and form into a ball. Place the dough in ThermoServer. Put the lid on and allow it to proof until it has doubled in size. Approx 2 hours. (time will vary please see notes)
- Oil the bench and tip the dough onto the oil. Break it into two even halves. Form each half into a ball. Work the ball so the sides are pushed under to pull the top taut.
- Place each ball in the jumbo loaf tin so that they have room to spread. The balls should have the seam side down and the smooth top facing up.
- Brush some oil over the top to prevent the plastic wrap from sticking. Place plastic wrap and then a tea towel over the dough.
- Leave the dough in a warm place for the second proof. The dough should not be baked until the loaf is above the sides of the bread tin.
- Preheat the oven to 180 degrees Celsius.
- Bake the bread for 30- 40 minutes or until it is golden and sounds hollow when you tap on the crust.
- Turn the bread out onto the wire cooling rack.
Notes
Log in: Then add your own recipe notes below!
Nutrition
I hope you have enjoyed this story. Feel free to leave a comment or start a discussion. If you have made a dish from this site, I would love to know what you thought!
Leaving a comment and a star rating helps others decide if they should try my recipe. Plus, if you hit the social media share buttons, your friends may find a delicious new recipe or Thermomix Tip too!
If you want to be notified when a new recipe is released, sign up for my monthly newsletter. The form is also in the footer!
Thank you for stopping by,
Happy Cooking
j xx

Link Disclosure
From time to time, I recommend kitchen products and ingredients. These are always items I use and love! When I share a link to a product, you can rest assured that I have tested the item and genuinely love it! If you follow my link and purchase the item, in some cases, I will receive a commission for the referral.
While the commission may only be $1 or so, I value your support, and I take your trust very seriously.
By clicking on my link or selecting me as the referrer, "Julie Carlyle," you reward me with a small commission that helps support me and this website.
Your support keeps me cooking!


Paricia Lewis says
Hi, About to try this loaf. Not happy with my breadmaker. Can I use this bread recipe in tin with the slide on lid or better without it. Regards Pat
Julie Carlyle says
Hi Paricia
Thank you for your question, yes you can use this recipe either with the lid on or off.
j
Tayla says
I have never had success with making homemade bread, I was going to buy a bread maker as I thought my failures was due to my oven, but I found this recipe and thought I’d give it one last go. I went and brought all fresh ingredients and a new loaf tin (not thermo one). WOW, best bread I have tasted in my life.
Thanks for the recipe!
Julie Carlyle says
Hi Tayla
I am so pleased you have had success! WELL DONE
Thank you so much for coming back and letting me know 🙂
jx
ROSALIE TAYLOR says
Love this recipe
Kim I S says
This is the best bread recipe I have ever used in the Thermomix, the bread is delicious and soft and fluffy with a lovely taste!
I didn't use bread improver either 😊
Dianne Ross says
Hi Julie thank you for an awesome bread recipe with straightforward instructions- my bread was a huge success and I will definitely be making it again. Now feel fearless with your recipe ⭐️👏🙏
Julie Carlyle says
Perfect! I love fearless cooks!!
I'm so pleased you had success with the butter and now the bread recipe.
Enjoy your cooking and stay fearless!
julie xx
Jan Cadwallader says
I’ve tried for years for a bread that is as nice the next day as when it first came out of the oven. All other bread recipes are like a scone dough the next day. The crust on this is beautiful and for toast this morning it was way beyond my expections. Absolutely delighted with this recipe which I will make it again and again. In fact I have another loaf in the oven! 🤣Thanks so much Julie for a truly great recipe.
Julie Carlyle says
Hi Jan
I am so pleased you like this recipe and had success! I love it to be crusty on the outside and soft in the middle too!
Thank you so much for coming back and leaving a comment, it makes my day 🙂
Bread making is one of my Therapeutic past-times, I find it so relaxing.
Happy Cooking
j xx